A multivitamin contains all (or hopefully most) of the necessary nutrients needed for a healthy body. You can also get those nutrients from the food you eat. For example nuts have protein, vitamin B, and omega fatty acids, greens have fiber, Vitamin C, K, Iron, and bananas have potassium.
Your compost is no different for your plants. You can either fertilize in the multivitamin approach, or you can feed them the inputs they need in the form of compost.
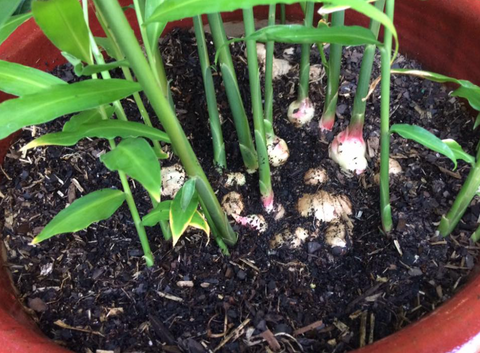
Compost is the process of breaking down organic material into a usable form of soil that contains all the necessary nutrients and structure to sustain plant life.
BUT... Not all compost is created equal!
compost can leach: Leaching is the process of nutrients being dissolved in water and running through your soil. Leaching can happen with rain, snow melt, or even irrigation. Fresh compost is always recommended!
You are what you eat: compost is only based on what you put in it. If you have low quality inputs, the output will be low quality
Leaves vs. grass: Leaves are from trees with deep roots. These roots extend 20-30 feet!they can often reach nutrients that are lost on the surface due to leaching, and are otherwise void from grass clippings which have shallow roots.
Variety is the spice of life: When it comes to a nutrient rich compost, having a wide variety of inputs is best. Leaves have lots of trace minerals, but lack nitrogen. Grass clippings have lots of nitrogen, but lack carbon or trace minerals. Mix it up and add things like eggshells and kitchen scraps too!
Bacteria vs. Fungi
Annuals benefit from a bacterially dominated compost, the bacteria source nitrogen and other nutrients from the soil. Bacterially dominated compost is achieved through hot composting.
perennials benefit from a fungally dominated compost. Fungi like mycorrhizae mine nutrients for the plant from the soil and increase the root mass. Fungally dominated compost is achieved through cold composting. Think leaves sitting on a forest floor!
courtesy: phys.org
Quick and "dirty" Guide to making great compost
Choose a Compost Bin or Pile:
You can use a compost bin, a designated area in your yard, or a pile to create compost. Bins help contain the compost and maintain a neater appearance.
Balance Carbon and Nitrogen:
Composting is often described as a balance between "browns" (carbon-rich materials) and "greens" (nitrogen-rich materials).
Browns include items like dried leaves, straw, shredded newspaper, and cardboard.
Greens include kitchen scraps (fruit and vegetable peels, coffee grounds), grass clippings, and fresh garden waste.
Aim for a C:N (carbon-to-nitrogen) ratio of roughly 25-30 parts carbon to 1 part nitrogen.
Chop or Shred Materials:
Smaller pieces of organic matter break down more quickly. Use a shredder or chop materials into smaller bits to speed up decomposition.
Layer Materials:
Alternate layers of browns and greens to maintain the carbon-to-nitrogen balance. Start with a layer of browns at the bottom.
Maintain Moisture:
Keep the compost pile consistently moist, similar to a wrung-out sponge. Water as needed to prevent it from drying out or becoming waterlogged.
Turn the Compost:
Regularly turn or aerate the compost pile to provide oxygen to decomposing microorganisms. Turning the pile also helps distribute moisture and speed up decomposition.
Cover or Enclose the Pile:
Covering the compost pile with a lid or using a closed bin can help regulate temperature, retain moisture, and deter pests.
Monitor Temperature:
Composting generates heat as organic matter breaks down. A compost pile can heat up to 130-160°F (54-71°C) when active. This heat kills weed seeds and pathogens, helping to create safe compost.
Avoid Adding Certain Materials:
Do not compost diseased plant materials, meat, dairy, oils, pet waste, or treated wood. These items can introduce pests or pathogens.
Patience is Key:
Composting takes time, typically several months to a year, depending on various factors like the size of the pile, materials used, and environmental conditions.
Harvest the Compost:
Once the compost is dark, crumbly, and earthy-smelling, it's ready to use in your garden. You can sift it to remove any remaining large or uncomposted materials.
]]>
https://migardener.com/blogs/blog/being-thrifty-in-the-garden2024-01-03T15:42:31-05:002024-01-03T15:48:41-05:00Being Thrifty In The GardenLuke MarionIn this week's blog post we want to focus on ways anyone with any budget can be thrifty with their garden. Starting a garden economically involves making thoughtful choices and utilizing cost-effective strategies. Here are some tips for economically starting a garden:
Save Seeds: Instead of buying new seeds, save seeds from fruits and vegetables you consume. This can significantly reduce costs. Watch this video on How To Save Seeds. You can also start saving your own seeds from the garden year after year, just make sure you are saving them from heirloom varieties. Save Seeds Packets.
DIY Compost: Create your own compost using kitchen scraps, yard waste, and other organic materials. Composting is an inexpensive way to enrich the soil. Compost Bin*
Choose Low-Cost Plants: Opt for seeds or seedlings of plants that are known to be prolific and easy to grow. These often include herbs, some vegetables, and certain flowers. Shop our Top Easy To Grow Picks, here.
Container Gardening: If you have limited space or poor soil quality, consider container gardening. You can use recycled containers, buckets, or even old tires as planters.
Borrow or Rent Tools: Instead of purchasing expensive gardening tools, consider borrowing or renting them. You may only need certain tools periodically, making it more cost-effective. If you can only chose one tool to invest in,make it a hand trowel, Trowels are a forever tool for the garden, including planting, transplanting, weeding, digging small holes, and cultivating soil. Its compact size and pointed blade make it easy to work with in both small and large gardening spaces.
Mulch: Mulching helps retain soil moisture, suppress weeds, and regulate soil temperature. Use organic materials like leaves, or grass clippings as mulch, which can often be obtained for free. Contact your local waste facility for any leads in where you can find this organic matter for free or for cheap!
Rainwater Harvesting: Set up a simple rain barrel to collect rainwater. This can reduce your reliance on tap water, which may save on water bills. You can use a repurposed barrel, sometimes sold on facebook marketplace or, we found this beautiful rain saver, that doubles as a planter as well, * this company makes an array of designs that can help perfectly blend with your landscaping and home.
Start Small: Begin with a small garden plot or a few containers. This allows you to manage costs more effectively and learn as you go. It can be anything as easy as a 5 gallon bucket or check out our MIgardener Fabric Grow Pots.
Use Household Items: Repurpose household items like egg cartons, yogurt containers, or newspaper for seed starting. This reduces the need to buy specialized seed-starting materials. If you are looking for something that will free you from using any container, you might want to invest on a soil blocker, check them out here. These handy devices allow you to sow directly in soil without having to start your seeds in containers. Woo!
We hope these tips help you with sticking to gardening and getting creative with things you may already have access too. Below are some gardening things we love using in our own gardening practices! Enjoy!
*MIgardener may earn a commission from purchases made through this link.
]]>
https://migardener.com/blogs/blog/family-feud-gardening-edition2023-12-28T17:02:42-05:002023-12-28T17:02:43-05:00Family Feud (Gardening Edition )Luke Marion
Our team put their thinking caps together and made a fun day at the Christmas Party this year by coming up with family feud style questions. We then asked MIgardener gardeners to join in on answering, we had over 700 responses and we then had to break them down to the top answers for each question! The team was riled up and had a blast! If you are looking to do something fun with your fellow gardeners or family, make sure to save this post! If you are not familiar with Family Feud, this is it in a nutshell :a popular game show where two families compete by answering survey questions to win points. The goal is to guess the most popular answers and win prizes. Hope you guys enjoy the game! Let us know if your family feuded or not! It was a fun time for all of us at MIgardener!
]]>
https://migardener.com/blogs/blog/quick-garden-diy-seed-bombs2023-12-06T10:36:46-05:002023-12-06T10:36:47-05:00Quick Garden DIY : Seed BombsLuke Marion
Seed bombs are a fun and eco-friendly way to contribute to greener spaces and promote biodiversity. These small, biodegradable balls are filled with seeds that, when dispersed, can sprout into beautiful plants.
Materials you'll need:
Clay: You can use clay powder or air-dry clay.
Compost or potting soil: Ensure it's fertile and suitable for your chosen seeds.
Seeds: Select native wildflower or herb seeds for best results.
Water: To moisten the mixture.
Mixing bowl and spoon.
Steps:
Prepare your seeds: Choose seeds that are well-suited to your local climate and ecosystem. Native wildflowers are often a great choice.
Mix the ingredients: In a mixing bowl, combine 5 parts clay, 1 part compost or potting soil, and 1-2 parts seeds. Gradually add water while mixing until you have a firm but malleable consistency.
Form seed bombs: Roll the mixture into small balls, about 1-2 inches in diameter. Ensure that the seeds are evenly distributed within each bomb.
Let them dry: Place the seed bombs on a tray or parchment paper and allow them to dry for 24-48 hours. They should harden and hold their shape.
Store or disperse: Once dry, your seed bombs are ready for action. You can store them in a cool, dry place until you're ready to distribute them in gardens, vacant lots, or other suitable locations.
Plant your seed bombs: Simply toss the seed bombs onto bare soil, and with rain and time, they will break down, allowing the seeds to germinate and grow into vibrant plants.
Picking The Right Seeds For Your Seed Bombs
When choosing seeds for your seed bombs, it's essential to consider your local climate, soil conditions, and the specific goals you have in mind for the area you plan to disperse them. Here are some recommended varieties for seed bombs:
Native Wildflowers: Native wildflowers are always a great choice because they are adapted to your region's climate and soil. Some popular options include:
Black-eyed Susan
Bluebonnet (in Texas)
California Poppy
Purple Coneflower
Milkweed (for supporting pollinators and monarch butterflies)
Lupine
Coreopsis
Herbs: Many herbs are well-suited for seed bombs and can attract beneficial insects or be used in culinary or medicinal purposes. Consider:
Basil
Cilantro
Dill
Chives
Lavender
Mint
Parsley
Butterfly and Bee-Friendly Flowers: To support pollinators, choose flowers that attract butterflies and bees:
Butterfly milkweed
Bee balm
Echinacea (Coneflower)
Lavender
Salvia
Low-Maintenance Plants: If you're looking for plants that require minimal care, opt for hardy, drought-tolerant varieties like:
Succulents (e.g., Sedum, Sempervivum)
California poppy
Wild bergamot
Shade-Tolerant Plants: For areas with partial or full shade, consider shade-tolerant wildflowers such as:
Columbine
Ferns
Hosta
Wild ginger
Native Grasses: Grasses play a crucial role in many ecosystems. Include native grass seeds for added diversity:
Little Bluestem
Buffalo Grass
Switchgrass
Indian Grass
Creating seed bombs is an easy and enjoyable way to contribute to the environment. Whether you're a gardening enthusiast or a nature lover, these little earth-friendly grenades can make a big difference in supporting local ecosystems. You can even put them in a nice box and gift them, or save them for your next gardening season!
]]>
https://migardener.com/blogs/blog/7-ways-to-reduce-fungus-gnats-indoors2023-12-01T00:00:00-05:002024-08-02T12:55:43-04:007 SIMPLE Ways to Reduce Fungus Gnats IndoorsLuke MarionMore]]>
Fungus gnats are ANNOYING!
Fungus gnats are the bane of any gardener or houseplant enthusiast. Those pesky little bugs fly around your plants, fly around your face, up your nose, in your eyes, and worst of all they eat plant roots and cause damage to plants!
So how can you correct the problem, or stop it from ever happening in the first place? In this article, I will give you 5 easy tips for preventing and even controlling them entirely.
CRITICAL MISTAKE: Only trying to kill the adults. Yes, the adults are part of the problem, but the eggs and larvae are the real problem. Target the adults with sticky traps, and then focus your energy on the soil! Because that's where the problem lies.
What a Fungus Gnat needs:
moisture: Fungus gnats need damp conditions. Their larva require adiquate moisture to grow, and develop into flies. The adults only live 24-48 hours and most of the damage is caused below the soil.
Organic material: As the name implies, a fungus gnat relies on… fungus to call a food source. Not just fungus, but also roots, living or dead, compost, organic matter, or anything that can be consumed for food.
remove organic material: compost and many bagged soils contain compost. This organic material will often host fungus gnat larva, which live and breed in the compost. By going with a soil-less mix, it may cost a bit more, but often it doesn't contain as many unwanted hitchhikers.
reduce watering: Watering your plants is a chore, but often gardeners overwater their plants, leading to access water. This excess water can lead to many problems like root rot, damping off, but also fungus gnats.
By letting your plants dry out in between waterings, it will greatly reduce the risk of hosting a community of unwanted fungus gnats.
Pesticides
Neem oil: Coming from the neem seed, this oil contains chemicals that are organic, but very useful at controlling the fungus gnats. Neem oil can also be used to control aphids, spider mites, and other pests! By mixing it in with water, and adding a few drops of dish soap allows you to water the soil and drench the soil.
Pyrethrum: Pyrethrum is from the daisy family and actually prohibits the reproduction cycle of the fungus gnat. There are many different organic options that work, but they all work basically the same.
courtesy: curious plant
Sterilizing
Boiling water: Boiling water will kill fungus gnat larva when poured into bagged soil. Before planting, pour boiling water into the soil to sterilize the mix and rid it of any fungus gnats.
Heat-treating soil: By placing your compost into the oven for 5 minutes at 350, your soil will be sterilized and free of any unwanted fungus, mildew, bacteria, and pests like fungus gnats.
Natural Barriers
Sand: fungus gnats use a corkcrew-like egg depositing method to bury the seeds. An adult fungus gnat can lay anywhere from 300-500 eggs in a single life cycle! The most simple way to prevent the fungus gnat fro laying eggs is by applying sand to the surface of your seed starts and pots of soil.
All it takes is a layer roughly ¼-½ " thick, we use playground sand, as it is the cheapest option. Almost any hardware store will have it.
]]>
https://migardener.com/blogs/blog/what-are-spider-mites-and-easy-ways-to-control-them2023-11-10T17:28:03-05:002023-11-10T17:52:17-05:00What are Spider Mites and Easy Ways to Control ThemLuke Marion
If your plants look blotchy, slightly white, but mottled green and pail, check the undersides of the leaf. If you notice slight webbing, you have spider mites. But...
What are spider mites?
Spider mites are tiny arachnids belonging to the family Tetranychidae. Despite their name, they are not insects but are more closely related to spiders and ticks. These minuscule pests measure only about 0.2 to 0.5 millimeters in size, making them nearly invisible to the naked eye. They are often red, yellow, green, or brown in color, depending on the species and their diet
Spider mites will consume the plant juices much like aphids and other pests, they do not trap bugs in their webs like regular spiders do. This causes considerable damage to plants.
How to control spider mites
Isolate infected plants / quarantine new ones:
If you notice a plant with spider mite infestation, isolate it from other plants to prevent the mites from spreading. Also, when new plants are purchased, or brought inside from outside you should always wait up to 2 weeks before integrating those plants with the rest.
Removal methods Spraying with Water: Use a strong stream of water to wash the mites off the plant's leaves. Be sure to target the undersides of the leaves where spider mites often reside. Repeat this process regularly to disrupt their life cycle.
Neem Oil: Neem oil is a natural insecticide that can help control spider mites. Mix a few drops of neem oil with water and spray it on your plants. Neem oil can also act as a repellent.
Insecticidal Soap: Insecticidal soaps are effective against spider mites. Follow the manufacturer's instructions and apply the soap solution to your plants, focusing on the affected areas. Horticultural Oils: Horticultural oils, such as dormant oil or summer oil, can suffocate spider mites and their eggs. Ensure you use these oils as directed, as some plants may be sensitive to oil sprays.
Predatory Insects: Introduce natural predators of spider mites, such as ladybugs, predatory mites, or lacewings, to your garden. These insects can help keep spider mite populations in check. Check out a video we did on a spider mite predator!
Prune and clean your plant Keep your garden clean and free of debris to reduce hiding spots for spider mites. Regularly remove fallen leaves and weeds.
Reduce plant stress Plant stress can encourage pests. By fertilizing adequately, new growth will be promoted before damaged growth becomes an issue. Heat and drought can also be an issue. On indoor plants, keep plants away from heaters, vents, and outside during peak summer ensure plants are getting adequate water to help reduce stress.
Keep pets at a distance This can be hard to do sometimes, but removing pets from around your plants can considerably cut down on spider mites, especially indoors. Dogs and cats often will roll around in the grass outside, pick up mites on their fur or hair, and when they brush against your plants it is the leading cause for spider mites on plants.
Monitor Regularly: Check your plants regularly for signs of spider mites, such as stippled or discolored leaves, webbing, and tiny moving specks on the leaves. Early detection can help you address the problem before it becomes severe.
]]>
https://migardener.com/blogs/blog/beginners-guide-to-container-gardening2023-10-24T23:55:47-04:002023-10-24T23:55:47-04:00Beginner's Guide To: Container GardeningLuke Marion
Follow along some great ways to start and expand in your gardening journey!
Container gardening has become a beloved pastime for garden enthusiasts and city dwellers alike. It allows you to cultivate a lush garden in small spaces, making it ideal for balconies, patios, or even indoors. Choosing the right plant varieties and container sizes is essential for your garden's success. In this article, we'll explore a variety of plants suited for container gardening and recommend the appropriate fabric pot sizes to help you achieve a thriving and vibrant garden.
Tomatoes:
Recommended Fabric Pot Size: 5-gallon or larger
Tomatoes need ample space for their roots. A 5-gallon fabric pot or larger ensures sufficient room for growth. Choose determinate varieties for smaller spaces.
Herbs:
Recommended Fabric Pot Size: 1-2 gallons per herb
Herbs like basil, mint, and rosemary thrive in smaller pots. Allocate 1 to 2 gallons per herb for a bountiful harvest.
Peppers :
Recommended Fabric Pot Size: 3-5 gallons
For pepper plants, select a 3 to 5-gallon fabric pot to accommodate their root systems. They appreciate the extra space for healthy growth.
Strawberries:
Recommended Fabric Pot Size: 1-2 gallons per plant
Plant one strawberry plant per 1 to 2-gallon fabric pot. Hanging baskets or strawberry pots work well for these sweet fruits.
Lavender :
Recommended Fabric Pot Size: 3-5 gallons
Lavender enjoys well-draining soil and room to stretch its roots. Opt for a 3 to 5-gallon fabric pot to accommodate its growth.
Salad Greens:
Recommended Fabric Pot Size: 1-2 gallons
Lettuce, spinach, and arugula can thrive in small spaces. Use 1 to 2-gallon fabric pots for a constant supply of fresh greens.
Dwarf Citrus Trees:
Recommended Fabric Pot Size: 10-15 gallons
Dwarf citrus trees require ample space for both their roots and canopy. Choose a 10 to 15-gallon fabric pot for healthy growth and fruit production.
Petunias (Petunia spp.):
Recommended Fabric Pot Size: 1-2 gallons
Petunias flourish in small containers. A 1 to 2-gallon fabric pot provides ample space for these colorful annuals.
Zinnias (Zinnia elegans):
Recommended Fabric Pot Size: 1-2 gallons
Zinnias are also content in 1 to 2-gallon fabric pots. Plant them for vibrant blooms and pollinator attraction.
Container Gardening Tips:
Choose High-Quality Fabric Pots: Invest in durable, breathable fabric pots to ensure proper drainage and aeration for your plants' roots.
Well-Draining Soil: Use a well-draining potting mix specific to your plant types. Good soil is essential for healthy container gardening.
Watering: Check soil moisture regularly, as containers can dry out quickly. Water thoroughly when the top inch of soil feels dry.
Sunlight: Position your containers in areas that receive the appropriate amount of sunlight for your chosen plants. Most vegetables and flowers require at least 6 hours of sunlight daily.
Fertilization: Apply a balanced, slow-release fertilizer to provide essential nutrients for your container plants.
Pruning and Maintenance: Regularly prune and deadhead your plants to encourage new growth and maintain a tidy appearance.
Container gardening offers a world of possibilities for gardeners with limited space. By choosing the right plant varieties and matching them with appropriately sized fabric pots, you can enjoy the beauty of flowers, the aroma of herbs, and the deliciousness of homegrown vegetables. With these tips and recommendations, you'll be well on your way to creating a flourishing and vibrant container garden, no matter where you live. Happy gardening!
]]>
https://migardener.com/blogs/blog/egyptian-onions-history-planting-and-uses2023-09-26T13:21:28-04:002024-08-02T12:26:05-04:00History, Planting and Uses of Egyptian OnionsLuke Marion
Egyptian Onions: A Time-Honored Crop with a Fascinating Past
Origin and History
Egyptian onions, often referred to as walking onions, top-set onions, or tree onions, are an ancient and remarkable vegetable that has left its indelible mark on human history. Despite their name, these onions are not exclusively tied to Egypt; their origins can be traced back to the Mediterranean region. They have been cultivated for millennia and were highly regarded in various ancient civilizations, including Egypt, Greece, and Rome.
These onions are unique due to their peculiar growth and propagation method. Instead of producing seeds, Egyptian onions develop small bulbs, known as bulbils, on the top of their stalks. When these bulbils mature, the stalks bend over, allowing them to touch the ground and root themselves, resulting in new onion plants. This characteristic earned them the name "walking onions" because they seem to wander through the garden, self-propagating as they go.
Planting and Cultivation
If you're intrigued by the history and versatility of Egyptian onions and want to grow them in your garden, here's a step-by-step guide to help you get started:
1. Selecting a Suitable Location: Choose a sunny to partially shaded spot in your garden with well-draining soil. These onions are adaptable but thrive in full sun.
2. Choosing Planting Material: You can start with bulbils, which are the small bulbs that form on the top of the onion stalks, or you can purchase sets from a reputable supplier. Bulbils are the most common way to propagate Egyptian onions.
3. Planting Time: Egyptian onions can be planted either in the fall or the spring. If planting in the fall, do so a few weeks before the first expected frost. For spring planting, wait until the soil is workable and not too wet.
4. Planting Depth: Plant the bulbils or sets about 1 inch deep and 4-6 inches apart in rows or clusters. If you're using bulbils, plant them with the pointy side up.
5. Soil Preparation: Ensure your soil is well-prepared by adding organic matter like compost to improve fertility and drainage. These onions are relatively tolerant of different soil types but prefer slightly acidic to neutral soils.
6. Watering and Maintenance: Keep the soil consistently moist but not waterlogged. Mulching around the plants can help retain moisture and suppress weeds.
7. Harvesting: During the first year, you'll harvest small bulbs that can be used in your kitchen just like regular onions. As the onion plants mature, the top bulbils will form and eventually bend to the ground. These can be collected in late spring to early summer, allowing for a continuous harvest.
8. Division and Transplanting: To prevent overcrowding, dig up and divide the clumps every few years. Replant the bulbils or use them to expand your onion patch.
Egyptian onions not only offer a historical connection to our past but also a continuous supply of flavorful and versatile onions for your culinary endeavors. Whether you're an experienced gardener or a beginner, these low-maintenance onions are an excellent addition to any garden. Their unique growth pattern and rich heritage make them a valuable and intriguing choice for gardeners looking to grow something extraordinary. Planting Egyptian onions is not just a horticultural endeavor; it's a journey through time and flavor that connects you with generations of growers who have cherished these remarkable onions.
Uses:
Green Onions or Scallions: The green shoots of Egyptian onions can be harvested and used as a substitute for scallions or green onions. They add a mild onion flavor to salads, soups, stir-fries, and garnishes.
Bulbs for Cooking: The small bulbs produced by Egyptian onions are edible and can be used in cooking just like traditional onions. They have a milder flavor and work well in soups, stews, roasts, and other dishes that call for onions.
Pickling: The small bulbils or baby onions from the top of the plant can be pickled and enjoyed as a tasty snack or condiment.
Flavoring Dishes: You can use Egyptian onion leaves, bulbs, or bulbils to infuse a subtle onion flavor into various dishes, including omelets, casseroles, and baked goods.
Potato and Salad Toppings: Chop the green shoots and add them to your baked or mashed potatoes or sprinkle them over salads for a fresh and mild oniony crunch.
Garden Ornament: Beyond their culinary uses, Egyptian onions can be grown as ornamental plants. Their unique appearance and growth habit make them an attractive addition to flower beds and gardens.
Propagation: Aside from consumption, Egyptian onions are often grown to propagate and expand your onion patch. The bulbils they produce can be replanted to grow new onion plants, ensuring a perpetual supply of onions.
Medicinal Uses: In some cultures, Egyptian onions have been used for their potential medicinal properties. They are believed to have various health benefits, including aiding digestion and providing essential vitamins and minerals.
Companion Plants: Some gardeners use Egyptian onions as companion plants to deter pests due to their pungent aroma. Placing them near other vegetables can help protect against insect infestations.
Landscaping: Egyptian onions can also be used for landscaping purposes. Their tall, arching stalks and unique topsets create an interesting visual element in gardens and can be used to define borders or create focal points.
Egyptian onions are prized for their versatility, making them a valuable addition to both the kitchen and the garden. Whether you enjoy them fresh, cooked, or for their ornamental value, these onions offer a unique and flavorful twist on traditional onion varieties.
]]>
https://migardener.com/blogs/blog/unlocking-the-history-of-garlic2023-09-13T11:39:12-04:002024-08-02T12:22:39-04:00Unlocking The History Of: GarlicLuke Marion
Garlic, with its pungent aroma and distinctive flavor, has enchanted chefs and home cooks alike for centuries. This humble herb not only adds depth to dishes but also boasts a rich history and a remarkable array of varieties.
The Origins of Garlic
The story of garlic begins in Central Asia, where it is believed to have originated over 7,000 years ago. It then made its way to the Middle East, India, and eventually found a home in the Mediterranean region. Garlic's hardiness and adaptability made it a valuable crop for ancient civilizations.
Ancient Egypt: Garlic as a Source of Strength
One of the earliest known references to garlic comes from the ancient Egyptians. Not only was garlic a dietary staple, but it also held mystical significance. Garlic bulbs were even found in the tomb of King Tutankhamun, a testament to its importance in their culture.
Ancient Greece and Rome: Culinary and Medicinal Uses
The Greeks and Romans embraced garlic not only for its culinary merits but also for its medicinal properties. Hippocrates, the father of modern medicine, prescribed garlic to treat various ailments. Soldiers in ancient Rome consumed garlic for strength and courage before going into battle.
Medieval Europe: Garlic's Rise to Popularity
In medieval Europe, garlic gained popularity as a versatile culinary ingredient. It was used to flavor soups, stews, and bread. Garlic's association with lower classes led to its exclusion from aristocratic cuisine, but it continued to thrive in the commoners' kitchens.
Varieties of Garlic
The world of garlic is far more diverse than most realize. While there are hundreds of varieties, garlic can be categorized into two main types: softneck and hardneck garlic.
Softneck Garlic Varieties SubTypes
Silverskin Garlic: Known for its long storage life, Silverskin garlic is a favorite among home gardeners. It has a mild flavor and is often used for making garlic braids.
Artichoke Garlic: This variety is popular in the United States. It produces large, easy-to-peel cloves and has a mild to moderate flavor.
Creole Garlic: Hailing from the southern United States, Creole garlic offers a spicy, robust flavor. It's an excellent choice for those who enjoy a bold garlic taste.
Hardneck Garlic Varieties: SubTypes
Rocambole Garlic: Renowned for its rich and complex flavor, Rocambole garlic is a favorite among chefs. Its cloves are wrapped in a single layer, making them easy to peel.
Porcelain Garlic: This variety is known for its large, easy-to-handle cloves and a strong, robust flavor. Porcelain garlic is prized by garlic enthusiasts for its heat and intensity.
Purple Stripe Garlic: As the name suggests, this garlic variety features beautiful purple stripes on its bulb wrappers. It has a spicy, full-bodied flavor that adds depth to dishes.
Elephant Garlic: Despite its name, elephant garlic is not a true garlic but a close relative. It produces enormous bulbs with a mild, garlic-like flavor. It's a popular choice for those who prefer a milder taste.
Hardneck Garlic Attributes
Stem and Scape: Hardneck garlic varieties produce a central woody stem, known as a "scape," that emerges from the center of the bulb. The scape can be edible and is often used in culinary applications.
Cloves: Hardneck garlic typically forms fewer but larger cloves, which are easy to handle and peel. These cloves are enclosed in a single layer, making them readily accessible.
Flavor: Hardneck garlic varieties are known for their robust and complex flavors. They often have a spicier, more intense taste compared to softneck varieties, making them favored by chefs for their culinary impact.
Storage: Hardneck garlic has a shorter storage life compared to softneck varieties, typically lasting around six to eight months.
Growth: It's better suited for regions with colder winters, as it requires a period of vernalization (cold exposure) to produce bulbs.
Softneck Garlic Attributes
Stem and Scape: Softneck garlic does not produce a central stem or scape, resulting in a more flexible neck. This makes it easier to braid the garlic bulbs together, which is a common practice for long-term storage.
Cloves: Softneck garlic varieties typically yield more, smaller cloves in multiple layers. While these cloves can be harder to peel, they are excellent for long-term storage.
Flavor: Softneck garlic varieties generally have a milder and sweeter flavor profile. They are a popular choice for dishes where you want a subtle garlic presence without overpowering the other flavors.
Storage: Softneck garlic has a longer storage life, often lasting up to a year or more if stored properly in a cool, dry place.
Growth: It is better suited for regions with milder winters, as it doesn't require as much vernalization as hardneck garlic to form bulbs.
Garlic's Global Influence
Garlic's journey through history has not been confined to one region; it has traveled the world and left its mark on countless cuisines. In Asia, garlic is a fundamental ingredient in dishes like stir-fries and curries. Mediterranean cuisines rely on garlic for the iconic flavors of pesto and tzatziki. In Latin America, garlic-infused sauces and marinades are essential components of their culinary traditions.
In Conclusion
From its humble beginnings in Central Asia to its global presence today, garlic has evolved into a culinary and cultural icon. Its diverse varieties offer a spectrum of flavors, allowing chefs and home cooks to experiment with this versatile herb. Whether you prefer the mildness of Silverskin or the boldness of Rocambole, garlic has a place in every kitchen, adding depth and complexity to dishes throughout history and into the future. So, the next time you savor that aromatic garlic-infused meal, remember the fascinating journey of this remarkable herb.
]]>
https://migardener.com/blogs/blog/the-difference-between-early-and-late-blight2023-07-05T00:00:00-04:002024-10-10T18:32:17-04:00Tomato Blight: How to Identify, Prevent and Treat This Plant DiseaseLuke Marion
Learn how to recognize, prevent, and treat tomato blight effectively to keep your garden filled with healthy plants and productive tomatoes.
As an organic gardener, I often feel like I’m at a disadvantage when it comes to dealing with plant diseases like tomato blight. It’s frustrating to watch my tomato plants suffer, often being the first to show signs of trouble. This challenging condition doesn’t limit itself to tomatoes; it also impacts my zucchini, cucumbers, pumpkins, squash, melons, potatoes, and even beans!
In this article, I’ll share how to recognize, prevent, and treat tomato blight effectively. This way, my garden can stay filled with healthy plants and productive tomatoes.
Tomato blight is a set of diseases that harm tomato plants. These diseases come from fungi, bacteria, and the environment. Knowing about tomato blight helps me grow healthy tomatoes. It lets me manage my garden and fight off diseases early.
Learning about blight can help us spot problems early, meaning we can act fast to prevent further disease. Understanding the disease's life cycle helps us predict when it might strike. Keeping plants healthy is also key as they’re less susceptible to the disease.
Understanding tomato blight helps me protect my plants from these diseases. Each part of learning about blight improves my garden and plant health. With the right knowledge and action, I can beat the challenges of blight.
Types of Tomato Blight
Knowing about tomato blight is key to managing diseases. There are three main types: early blight, late blight and Septoria blight. Each type has its own signs and effects on plants.
Early Blight
Early blight is a common disease affecting plants, particularly those in the nightshade family, such as potatoes and tomatoes. It's caused by a soil-borne fungus called Alternaria solani. The name "early" does not imply that the disease occurs only early in the growing season, but it does most commonly occur early in the season.
Symptoms of early blight usually start appearing on the lower, older leaves as small brown spots. These spots enlarge, often forming a pattern of concentric rings giving a "bull's-eye" appearance. The surrounding leaf area may turn yellow. If left uncontrolled, it can cause significant defoliation, usually starting at the base of the plant and moving upwards.
Early blight can also affect the fruits of the plant. On tomatoes, dark, sunken, leathery spots can form, usually (but not always) at the point where the fruit is attached to the plant.
Late Blight
Late blight is a serious and devastating plant disease caused by the pathogenic water mold Phytophthora infestans. It's most infamous for causing the Irish Potato Famine in the 1840s, but it also affects other plants in the nightshade family, such as tomatoes, peppers, and eggplants.
This pathogen prefers cool, damp, and humid conditions and can spread rapidly, especially in these environments. It is one of the few plant pathogens that can produce spores both asexually and sexually, leading to great genetic diversity and adaptability.
Symptoms of late blight typically appear later in the growing season. Initial symptoms include irregularly shaped dark spots on leaves, often surrounded by a pale "halo". As the disease progresses, it may cause the entire plant to wilt and die.
It can also cause dark, firm lesions on tubers and fruits. The fruit of plants affected with late blight should not be eaten.
Septoria Blight
Septoria leaf spot, also known as Septoria blight, is a common fungal disease that primarily affects tomatoes but can also occur on other plants. It is caused by the fungus Septoria lycopersici.
Septoria leaf spot usually appears on the lower leaves after the first fruit sets. The disease begins as small, water-soaked spots. These spots darken and enlarge to form circular or angular grey or tan areas that may be up to 1/4 inch in diameter. The center of these spots later turn white and tiny black specks, which are the fruiting bodies of the fungus, can often be seen in the white centers.
This disease does not typically affect the fruit directly, but by defoliating the plant, it can lead to sunscald on the fruit. Also, heavily defoliated plants will produce fewer, smaller fruit.
Type of Blight
Causing Agent
Key Symptoms
Impact on Plants
Early Blight
Alternaria solani
Dark brown spots with concentric rings, yellowing leaves
Early leaf drop, reduced yield
Late Blight
Phytophthora infestans
Water-soaked lesions, mushy appearance on leaves and fruits
Rapid plant decline, potential crop loss
Septoria Blight
Septoria lycopersici
Affects the leaves, primarily, with dark circular or angular grey or tan areas.
Defoliates the plant, leading to sunscald on the fruit.
What Causes Early Blight?
Early blight, caused by the fungus Alternaria solani, is a big threat to tomato plants. This fungus thrives under certain conditions. It's important to know what causes early blight to manage it well.
The following environmental factors can greatly increase the risk of early blight. By noticing and changing these conditions, you can lower the disease risk in your garden.
Cause
Description
Impact on Plants
Warm, Wet Conditions
High humidity and temperatures between 75-86°F create optimal conditions for fungus growth.
Facilitates rapid spread of early blight.
Moisture on Leaves
Water left on leaves overnight encourages fungal spores to germinate.
Increases the risk of infection.
Overcrowding
Plants that are too close reduce airflow, trapping moisture.
Heightens chance of disease outbreak.
Tomato Plant Stress
Water stress and nutrient shortages weaken plants, making them susceptible to infection.
Increases vulnerability to early blight.
What Causes Late Blight?
Late blight is a major threat to tomato plants, caused by Phytophthora infestans. This pathogen spreads quickly and can destroy crops. Knowing what causes late blight helps us fight it better.
Key causes include:
Cool, wet and humid conditions that favor fungal growth.
Plant leaves touching the ground are exposed to spores.
Overcrowded and unpruned plants.
Knowing how late blight works helps us find ways to stop it.
Stage of Infection
Symptoms
Impact on Plant
Initial Infection
Water-soaked lesions on leaves
Leaves begin to wilt and decline
Advanced Stage
Dark brown, decaying spots
Overall plant health deteriorates
Fruit Infection
Circular, dark spots on tomatoes
Fruit becomes inedible
How to Identify Tomato Blight
It's key to spot tomato blight symptoms early to keep my plants healthy. Catching it early means I can act fast and reduce damage. Knowing the signs of early and late blight helps my tomatoes grow well.
Signs of Early Blight
Looking for early blight signs, I check the lower leaves of my tomatoes. Early blight starts with dark brown or black spots with a yellow ring around them. These spots can make leaves dry up and fall off, weakening the plant and spreading disease.
Signs of Late Blight
Late blight signs are more serious. They show up as light brown, wet spots that grow fast. If ignored, they can destroy the whole plant. Spotting these signs early can save my tomatoes and keep my garden healthy.
Tomato Varieties With Some Resistance to Blight
Choosing the right tomato variety is key to keeping them healthy. I look for blight-resistant tomato varieties that fight off diseases. These include ‘Defiant’ and ‘Brandywine’ which are great against early and late blight.
Tomato Variety
Resistance Type
Characteristics
Defiant
Early & Late Blight
Medium-sized fruit, disease-resistant, great flavor
Environmental control measures can greatly lower the risk of blight. Here’s what I focus on:
Watering Practices: I water my plants in the early morning. This lets any extra moisture evaporate before night, controlling humidity. Learn more about garden watering strategies here. Also, check out this post on how to reduce your garden water bill.
Sunlight Exposure: My tomato plants get full sunlight most of the day. This keeps their leaves dry and boosts their health.
Knowing exactly how to treat infected tomato plants can be confusing with so much varying information out there. But rest assured, it's actually very easy to treat any form of blight, as long as you catch it early and treat it until it's gone.
Start by cutting off any infected leaves. This stops the disease from spreading and lets healthier parts grow. Keeping a close watch on your plants helps you catch and remove sick parts quickly.
Using organic fungicides is also important. These products help fight off infections. Applying them regularly during the growing season helps protect your plants from early blight, late blight, Septoria blight and even powdery mildew.
Though you can use organic fungicides like neem oil or potassium bicarbonate, or even copper-based fungicides, they’re expensive. I have used a solution made from ingredients you likely already have in your kitchen for years, and it’s always done the trick.
Baking Soda Treatment for Early Blight, Late Blight & Powdery Mildew
Baking soda works by creating an alkaline environment on the leaf, and fungi cannot colonize the surface of the leaf since they need a neutral pH (around 7.0) to survive and thrive.
This spray of water and baking soda will change the leaf's pH from around 7.0 to around 8.0. This change is enough to kill and prevent all blight spores!
1 Tablespoon Vegetable Oil - Whatever vegetable oil you use in your home for cooking will do. Olive, avocado, canola, etc. This helps the spray to stick to the leaves.
2 Drops Dish Soap - The dish soap helps emulsify the mixture. Don't skip this ingredient! I like to use a free and clear option to avoid unnecessary chemicals and dyes on my plants (we're growing food we want to eat, after all).
Spray Bottle - You'll need some kind of sprayer. Since you'll likely need to reapply this multiple times, I recommend a pressurized pump sprayer.
Step-by-Step Directions
Mix 3 tablespoons baking soda with 1 gallon of water.
Mix in 1 tablespoon vegetable oil, or cooking oil of your choice.
Mix in 2 drops of dish soap.
Gently stir to combine (while avoiding too many bubbles from forming).
Add solution to your spray bottle and spray on tops and bottoms of leaves until they're dripping with the solution.
Pro Tip: Begin with 3 tablespoons of baking soda and apply once weekly for three weeks. If fungus is still growing or spreading, increase to 3 ½ Tablespoons and continue spraying once per week for an additional three weeks.
WARNING: Spray in the morning or evening, as spraying in the heat of the day can harm your leaves. It’s ideal to spray in the early morning to avoid wet leaves sitting overnight.
FAQ
What are the main symptoms of tomato blight?
Tomato blight shows up in different ways, depending on the type. Early blight causes dark brown spots with rings on lower leaves, which may die off. Late blight leads to water-soaked lesions that turn light brown, potentially killing the plant.
How can I prevent tomato blight in my garden?
To stop tomato blight, plant tomatoes with enough space for air to move around them. Rotate crops yearly and avoid watering overhead to keep leaves dry. Good sunlight and managing humidity are also key to prevention.
Can certain tomato varieties resist blight?
Yes, some tomatoes like ‘Defiant’ and ‘Brandywine’ are made to fight early and late blight. Choosing these can lower the chance of infection.
What should I do if my tomato plants are infected with blight?
If tomatoes show any signs of blight, cut off and discard any infected leaves to stop the disease from spreading. Use the baking soda spray weekly, watch plants closely and act fast at first signs of disease.
What environmental conditions contribute to the development of tomato blight?
Blight loves heavy dew and cool, wet weather. These create high humidity that helps fungi grow.
What is the difference between early blight and late blight?
Early blight, from Alternaria solani, hits older leaves with dark spots and a yellow ring. Late blight, from Phytophthora infestans, causes fast plant decline and is known for its severe effects, like the Irish Potato Famine.
How can I identify tomato blight early?
Spotting tomato blight early means checking for leaf spots, wilting, and plant health. Looking for dark spots or water-soaked lesions helps to catch problems early.
How can moisture affect tomato plants and their susceptibility to blight?
Too much moisture from dew or bad watering helps fungal diseases like early and late blight grow. Keeping leaves dry and ensuring good airflow can reduce these risks.
]]>
https://migardener.com/blogs/blog/how-to-grow-blackberries-a-complete-growing-guide2023-03-15T18:04:47-04:002023-03-22T11:04:06-04:00How to Grow Blackberries - A Complete Growing GuideLuke Marion
Blackberries are a delicious and nutritious fruit that are not only easy to grow, but also a rewarding addition to any home garden. With their sweet, juicy taste and high antioxidant content, blackberries are perfect for desserts, jams, or simply snacking on. In this comprehensive guide, we will cover everything you need to know about growing blackberries, including choosing the right variety, planting, caring for the plants, and harvesting the fruit.
Choosing the Right Blackberry Variety
Thornless vs. Thorny Varieties Thornless blackberries, such as 'Apache', 'Arapaho', and 'Navaho', are easier to handle and harvest. Thorny blackberries, like 'Brazos' and 'Darrow', may produce larger, sweeter fruit but can be more difficult to manage due to their prickly stems.
Everbearing vs. Summer-bearing Varieties Everbearing blackberries, such as 'Prime-Ark Freedom' and 'Prime-Ark Traveler', produce two crops per year, with a smaller spring crop and a larger fall crop. Summer-bearing blackberries, like 'Chester', 'Natchez', and 'Triple Crown', produce one large crop during the summer months.
Planting Blackberries
Choose a location with full sun (at least 6 hours of direct sunlight per day). Ensure the area is well-draining soil with a pH of 5.5 to 7.0. Conduct a soil test to determine pH and adjust accordingly. Avoid low-lying areas where water tends to settle, as this will lead to rot and disease later on. Plant bare root blackberries in early spring, while they are still dormant, this will reduce transplant shock. Container-grown blackberries can be planted anytime during the growing season.
Space plants 3 to 5 feet apart in rows that are 8 to 10 feet apart. Dig a hole large enough to accommodate the root system, spreading the roots out in the hole. Plant the blackberry at the same depth it was previously growing, and backfill the hole with soil. Once the plant has been successfully planted, remember to water thoroughly.
Watering
Provide 1 to 2 inches of water per week, either through rainfall or supplemental watering. Avoid overwatering, as this can
lead to root rot and other diseases. Blackberries can benefit from a good layer of mulch to prevent them from drying out. In our garden we use a shredded wood mulch that we get for free from our local DPW where they collect yard waste and mulch it up.
Fertilizing
Apply a balanced fertilizer, (we use Trifecta+) in the early spring and again in midsummer, according to the package instructions. It is important to fertilize blackberries twice a season due to the enormous fruit yields and stress that can put on the plant. We will also top dress with a bit of compost once a year to continue to amend and feed the surrounding soil.
Pruning
Prune blackberries in late winter or early spring, removing any dead, damaged, or diseased canes. For summer-bearing varieties, remove the canes that fruited the previous year, leaving new canes to produce fruit. For everbearing varieties, prune the top 1 to 2 feet of the canes that produced a fall crop, allowing them to fruit again in the spring.
Trellising
Install a trellis system to support the canes and make harvesting easier. Simply train the canes onto the trellis as they grow, tying them loosely with garden twine. Tresslising will also keep plants from touching the ground. It will
]]>
https://migardener.com/blogs/blog/how-to-grow-raspberries-complete-growing-guide2023-03-15T16:38:51-04:002023-03-22T11:03:49-04:00How to Grow Raspberries - Complete growing guideLuke Marion
Raspberries are delicious and nutritious fruits that are easy to grow in your backyard garden. They are a great source of vitamins, antioxidants, and dietary fiber. In this blog post, we will discuss the various aspects of growing raspberries, from selecting the right variety to maintaining the plant's health and productivity.
Plant Selection - The first step in growing raspberries is to select the right variety. There are two types of raspberries: summer-bearing and everbearing. Summer-bearing raspberries produce fruit once a year, while everbearing raspberries produce fruit twice a year – once in summer and once in fall.
When selecting a variety, consider the climate of your region, the available space, and your personal preferences. Popular varieties of summer-bearing raspberries include 'Heritage,' 'Royalty purple,' 'prelude' and 'Double Gold'. Everbearing varieties include 'Autumn and 'Fall Gold.'
Many gardeners think that they need multiple varieties to set fruit, this is untrue. Raspberries are self fruitful, meaning just one will set fruit. However, if you have more than one plant the odds of setting fruit are increased.
Soil - Raspberries grow best in well-drained, fertile soil with a pH level of 5.5-6.5. Before planting, amend the soil with compost or aged manure to improve its fertility and structure. It is also essential to remove any weeds or grass from the planting site and loosen the soil to a depth of 8-10 inches.
Planting - Raspberries can be planted in the early spring or fall, depending on the variety and the climate. Space the plants 2-3 feet apart in rows that are 6 feet apart. Plant them at the same depth they were in their containers, and water thoroughly after planting.
Raspberries can be planted in containers as well! For best results, use a deep container. This will keep them from spreading too which can be a benefit for those with less space.
Plant care and maintenance - Raspberries require some training and pruning to maintain their health and productivity. The plants should be trained to grow on a trellis or a support system to keep them upright and to facilitate fruiting.
Summer-bearing raspberries should be pruned after harvest, in the late summer or early fall. Cut all the canes that produced fruit to the ground, leaving the new canes to grow for next year's crop. Everbearing raspberries should be pruned twice a year – once in the early spring and once in late summer or early fall. In the spring, cut all the canes that produced fruit the previous year to the ground, leaving the new canes to grow. In late summer or early fall, cut the top third of the new canes to encourage lateral branching.
Raspberries are susceptible to various pests and diseases, including aphids, spider mites, raspberry crown borers, and root rot. To control pests, use insecticidal soap or neem oil, and remove any infested leaves or canes. To prevent disease, avoid overhead watering, and maintain good air circulation by pruning and thinning the plants regularly.
Watering and fertilizing - Raspberries require regular watering, especially during the fruiting season. Water deeply once a week, providing 1-2 inches of water each time. Avoid watering the leaves, as this can promote fungal diseases. Watering fruit can also cause mold to develop on the soft flesh of the raspberry leading to grey mold.
Fertilize raspberries in the early spring with a balanced fertilizer, such as 10-10-10, following the manufacturer's instructions. In the late spring or early summer, apply a nitrogen-rich fertilizer, such as ammonium nitrate or blood meal, to encourage growth and fruiting.
]]>
https://migardener.com/blogs/blog/complete-guide-to-growing-rhubarb2023-03-10T00:38:23-05:002024-07-24T16:53:55-04:00Complete Guide to Growing RhubarbLuke Marion
Who doesn't love the sweet and tart flavor of rhubarb? The giant leaves, and beautiful deep red stems. Surprisingly enough, rhubarb isn't very hard to grow. In this blog post I will go through how to grow it from start to finish.
Location: Rhubarb prefers a cool, moist environment, so choose a planting location that gets partial shade and has well-draining soil. Avoid planting in areas that are prone to flooding or have heavy clay soil. Prepare the location by adding compost or aged manure to improve soil fertility and structure. Rhubarb plants also prefer a slightly acidic soil with a pH between 6.0 and 6.8.
Planting: Generally, rhubarb is planted from smaller roots that have been divided off from a main plant, however seeds can also be used. Seeds take a bit more time from planting until harvest, but are more economical. If starting from a small crown, plant in early spring as soon as the soil is workable. Dig a hole that's deep enough to accommodate the plant's root system, and plant the crown (the fleshy base of the plant) so that the top of the crown is just above the soil level. It is VERY important not to bury the crown. This can cause a disease known as crown rot. Space the plants about 3 feet apart.
Care: Rhubarb is a relatively low-maintenance plant, but there are a few things you can do to ensure it stays healthy and productive. In the fall, cut back the dead foliage to the ground, and add a layer of compost or aged manure around the base of the plants. Rhubarb can also be divided every 4-5 years to keep the plants from becoming too crowded.
If you want more harvest larger stalks, and earlier, try a method called blanching. This is the process of taking a clay pot, or something that will block sunlight, and covering them in early season. It will cause the plants to stretch and offer you a better harvest. The amount of time you blanch a crop depends on the desired result, generally 1-3 weeks. If a plant is kept covered for too long however, it can kill it by preventing photosynthesis.
Watering: Water newly planted rhubarb regularly, up to 3 times a week if needed. Getting plants established is key. Once they are established, plants will be more self sufficient and not require much watering beyond what they get from regular rainfall. Their lack of maintenance is due to the large deep burrowing roots that penetrate deep into the soil up to 2 feet deep! This not only finds lots of nutrients and water, but also ensures the plant will come back year after year
even after the coldest winters.
Fertilizer: Rhubarb doesn't require a lot of fertilizer, but you can add a balanced fertilizer (such as a 10-10-10), we use Trifecta+ in the spring and again in the fall. The thick deep roots do a great job of sourcing nutrients deep in the soil otherwise many plants are unable to obtain.
Mulch: Mulch around the base of the plants with a layer of organic material such as straw or shredded leaves. This will help retain moisture in the soil and suppress weed growth.
Harvesting: You can begin harvesting rhubarb in its second year of growth. Only harvest the stalks, leaving the leaves behind.To harvest, grasp the stalk near the base and pull it away from the plant with a gentle twist. Cutting the plant with a knife is also a great way to harvest. Be careful to just harvest red stalks, and be careful to not cut into the crown of the plant.
]]>
https://migardener.com/blogs/blog/how-to-grow-elderberry-natures-original-farmacy2023-03-09T22:03:14-05:002023-04-07T13:18:45-04:00How to Grow Elderberry - Nature's Original FARMacyLuke Marion
Elderberries are the fruit of the elder tree, which belongs to the Sambucus plant genus. The berries are small, dark purple to black in color, and grow in clusters. Elderberries have a tart, slightly sweet flavor and are commonly used in culinary applications, such as in jams, jellies, syrups, and baked goods.
In addition to their culinary uses, elderberries have also been used for medicinal and culinary purposes for centuries, and evidence suggests that they have been cultivated for at least 4,000 years. The ancient Egyptians, Greeks, and Romans all used elderberries for their medicinal properties, and they were also commonly used in traditional European medicine.. They are rich in antioxidants and other beneficial compounds, and have been used to boost the immune system, reduce inflammation, and relieve cold and flu symptoms.
Elderberries are a rich source of vitamins and minerals; Here are some of the vitamins and nutrients found in elderberries!
Elderberries are a good source of vitamin C, which is important for immune function, skin health, and wound healing. Vitamin B6, which is important for brain function and the production of hormones and neurotransmitters. Iron, which is important for the production of red blood cells and the transportation of oxygen throughout the body. Potassium, which is important for maintaining healthy blood pressure and heart function. Dietary fiber, which is important for digestive health and can help lower cholesterol levels. Antioxidants, including flavonoids and anthocyanins, which can help protect against oxidative stress and inflammation.
Here is how you can grow them at home! Elderberries are relatively easy to grow and can be cultivated in a variety of climates, although they prefer temperate regions with mild winters. Here are some steps you can follow to grow elderberries:
HOW TO GROW ELDERBERRIES
Pruning: Elderberries should be pruned annually to remove any dead or damaged wood and to promote new growth. Prune in the late winter or early spring. Pruning out older growth can also make way for newer fruiting wood.
Planting: Elderberries can be propagated from cuttings or from seed, but cuttings are generally more reliable. Plant cuttings in the early spring, about 2-3 inches deep and 6-8 feet apart. As elderberry bushes mature, they will grow in clusters. They are known as a communal bush. There are two types of Samyl and Samdal both need to be in the area to produce berries.
Location: Elderberries prefer a location with well-draining soil and plenty of sunlight. They can tolerate a range of soil types, but prefer slightly acidic soil with a pH around 6. Elderberries also do not mind being crowded, they grow in scrubby fields naturally.
Watering and fertilizing: Elderberries prefer moist soil, so water them regularly, especially during hot, dry periods. You will find that the berries will form better and plants will have better fruit set with adequate moisture. Fertilize them two times a season with a well balanced fertilizer. In spring I use Trifecta+, because it will provide Nitrogen to get the plant out of dormancy. You can use anything high in Nitrogen though. In the Fall we use Trifecta+ because it has good amounts of Phosphorus to help establish the plant but use a fertilizer of your choice.
Harvesting: Elderberries typically ripen in late summer or early fall. Harvest the berries when they are fully ripe and deep purple in color. You can use the berries fresh or preserve them by freezing or drying. ***It's important to note that consuming raw elderberries can be toxic, so they should be cooked before consumption
Propagating You can take cuttings from the plant and stick them in a bucket of sand. The sand should be kept damp at all times. Not soaking wet, but damp. This will allow for the elderberry cuttings to root in 4-5 weeks.
A simple recipe for making elderberry syrup:
Ingredients
1 cup fresh or 1/2 cup dried elderberries
3 cups water
1 cinnamon stick
1 teaspoon grated ginger
1/2 teaspoon whole cloves
1 cup honey
Instructions:
Rinse the elderberries and remove any stems and leaves. Place them in a saucepan with the water, cinnamon stick, ginger, and cloves.
Bring the mixture to a boil, then reduce the heat and let it simmer for 30-45 minutes, or until the liquid has reduced by about half.
Remove the pan from the heat and let it cool for a few minutes. Strain the mixture through a fine-mesh strainer into a bowl or large measuring cup.
Measure the amount of liquid you have and return it to the saucepan. Add an equal amount of honey to the liquid (e.g. if you have 1 cup of liquid, add 1 cup of honey) and stir to combine.
Heat the mixture over low heat, stirring occasionally, until the honey has dissolved completely.
Remove the pan from the heat and let the syrup cool completely. Pour it into a clean glass jar or bottle and store it in the refrigerator.
You can take the elderberry syrup by the spoonful or mix it with water or tea. It's a delicious way to boost your immune system and ward off cold and flu symptoms.
]]>
https://migardener.com/blogs/blog/how-to-grow-dahlias-everyones-favorite-cut-flower2023-03-01T22:32:18-05:002024-08-02T12:27:41-04:00How to Grow Dahlias - Everyone's Favorite Cut FlowerLuke Marion
When you think of a flower that everyone loves, you think of dahlias. Large, small, colorful, unique shapes, and vases of them at cut flower stands are enough to make you fall in love with summer every year.
History of Dahlias
Dahlias are native to Central and South America, specifically the mountainous regions of Mexico and Guatemala. They were first discovered by Spanish explorers in the late 18th century, and were named in honor of Swedish botanist Anders Dahl.
The first recorded cultivation of dahlias was in the Botanical Gardens of Madrid, Spain in the early 1800s. From there, dahlias were introduced to other parts of Europe, and eventually made their way to North America.
In the early 19th century, dahlias became very popular among European gardeners, who began to hybridize and cultivate them for their beautiful blooms. This led to the development of a wide variety of dahlia cultivars, ranging in size from small pom-pom blooms to large dinner-plate blooms.
Did you know?!?
There are over 42,000 registered dahlia cultivars, with new cultivars being developed each year. These cultivars come in a wide range of colors, shapes, and sizes, and are classified into several different categories based on their flower form. Some of the most popular dahlia categories include:
Decorative "dinner plate" dahlias: Larger than life, fully double blooms with flat or slightly curled petals.
Cactus dahlias: Narrow, pointed petals that curve backward from the center of the flower.
Pompon dahlias: Small, ball-shaped blooms with tightly packed petals.
Anemone dahlias: A central cluster of tubular florets surrounded by one or more rings of flat petals.
Single dahlias: A single row of petals surrounding a central disk of small florets.
Waterlily dahlias: Fully double blooms with broad, flat petals that are often crinkled or twisted.
Fimbriated dahlias: Petals that are split or fringed at the tips
How to grow Dahlias
Location
Dahlias thrive in full sun and well-draining soil. Make sure to choose a location that receives at least six hours of sunlight per day. Additionally, make sure that the soil is well-draining, as dahlias do not like to be waterlogged. If you have heavy clay soil, consider adding compost or sand to improve drainage.
Planting
Dahlias can be planted from seed, or from tubers. If starting from seed, start seeds 8-12 weeks before your last frost date. Start them in good well draining mix with lots of light. If you are planting tubers, they are planted in the spring, after the last frost has passed. Dahlias will not tolerate any frost, so ensure the weather is warm enough. Make sure to plant the tubers at a depth of around 6 inches, and space them around 18 inches apart. If you are planting multiple rows, space the rows around 3 feet apart.
Water and fertilize
Dahlias need to be watered regularly, especially during the hot summer months. Because they form tubers, this requires tremendous amounts of energy and water to form. Make sure to water them deeply at least once a week, and more frequently during hot and dry periods. Additionally, fertilize your dahlias regularly with a balanced fertilizer to promote healthy growth and vibrant blooms. We use Trifecta+ with amazing success, but use whichever balanced fertilizer you trust.
Provide support! ***VERY IMPORTANT***
As dahlias grow, they will become top-heavy and require support to prevent them from bending or breaking. Stake your dahlias with bamboo canes or other support structures, making sure to do so early in the growing season.
Deadheading
Dahlias produce a lot of blooms, but these blooms do not last forever. Deadheading your dahlias regularly will promote the growth of new blooms and prevent the plant from putting energy into producing seeds. Simply snip off the spent blooms with a pair of shears or scissors.
Overwintering
Dahlias are not cold-hardy and need to be protected during the winter months. After the first frost, dig up your dahlias and store them in a cool, dry place. Make sure to cut back the foliage to the ground. Dig the plant up like a potato and gently brush off any soil. Clip tubers from the root system being very careful to not damage the "eyes" which grow very close to the main stem. Store the tubers in peat moss, sand or vermiculite and keep them damp at all times but not soaking and a place where the temperature stays around 40-50 degrees Fahrenheit.
]]>
https://migardener.com/blogs/blog/what-are-soil-mites-what-does-it-mean-if-you-have-them2023-02-22T21:55:11-05:002023-03-08T10:18:47-05:00What are Soil Mites & What Does it Mean If You Have Them?Luke Marion
Have you ever watered your soil in your seed starting room when all of the sudden your worst nightmares come true? The soil starts to come to life and dozens or even several hundred tiny little creepy crawly little bugs start to vacate the soil as the water moves through the pot. Or maybe you see them actively roaming the soil surface and you feel as if you are being taken over by an outbreak of pests.
What are these? And what does it mean if you have them? Well, you have soil mites.
What are soil mites?
Soil mites are a diverse group of small arthropods that. They are typically found in soil, leaf litter, and other organic matter. Soil mites are important decomposers, helping to break down organic matter and recycle nutrients in the soil. They play a key role in the soil food web, as they are a food source for other soil organisms, such as springtails, nematodes, and predatory mites.
Soil mites come in many different shapes and sizes, ranging from less than 0.2 mm to over 2 mm in length. They have eight legs and a soft body covered in fine hairs, which help them move through soil and cling to surfaces. Some soil mites are predatory, feeding on other small soil animals, while others are detritivores, feeding on only decaying organic matter. Some soil mites are also known to feed on plant roots, and can be harmful to plants in large numbers. Soil mites can be grey, brown, tan, white, or even red in color.
What does it mean if you have soil mites indoors?
Soil mites are present in most soils. Particularly soil that has not been sterilized, has been left outside for some time, potting soil or seed starting mix with compost, or soil that has been transplanted with plants from outdoors.
Soil mites need specific conditions to reproduce and thrive. It is generally found that soil mites are present in soil that is damp, rich in organic matter, warm, un-compressed, and lacking natural predators.
This is why seed starting mixes are so prime for soil mites. Seed starting mixes hold on to water well, they are loose, you generally start seeds in warm locations, and there is generally very few if any natural predators indoors when seed starting occurs.
What can be done if you have soil mites?
1. Diatomaceous earth - DE as it is called for short, is made from crushed diatoms is 100% naturally occuring. The crushing creates tremendous surface area creating a microscopic abrasive surface which irritates the mites and causes them to shed their coat and die. Mixing DE into the soil or dusting it on the surface will help prevent them from getting out of control. I find the best brand is this one.
2. Reducing watering - Soil mites can survive in dry soil for quite some time, however dry soil regulates their ability to reproduce. causing them to be reduced in numbers and regulating them until plants can be moved outdoors where they will not be a problem. Soil mites are decomposers, and they require water to help digest plant material.
Also, consider putting a fan by the seedlings. Not only will this help with airflow which is vital to healthy seedlings, it will also reduce soil moisture from sticking around and welcoming soil mites.
3. Go soilless - Soilless mixes will not have as much decomposing organic material which is what they use as a food source. Mixes that contain peat moss or coco coir will be better than soil that contains lots of compost, manure, or top soil.
4. Sterilize the soil - If you haven't planted yet, try heating your soil. Simply put it in an oven safe pan, at 350 degrees for 5 minutes. Soil once heated will kill any mites or even other bacteria and mold spores resulting in better soil for your plants in an indoor environment.
One final note!
Soil mites are NOT the same thing a spider mites. Yes, they are in the same family but not the same insect. They should not be treated the same in the control methods either.
I hope you enjoyed, and hopefully you learned something that you can apply to your garden. Grow bigger, - Luke
]]>
https://migardener.com/blogs/blog/how-to-grow-catnip-for-yourself-and-your-cats2023-02-22T19:43:57-05:002024-07-24T16:52:10-04:00How to Grow Catnip - For yourself AND Your Cats!Luke Marion
Catnip (Nepeta cataria) is a perennial plant zones 3-9 that is native to Europe, Asia, and Africa. The exact origin of catnip is not known, but it is believed to have originated in the Mediterranean region or in Central Asia, historians are not entirely sure due to herbalism being widespread in most of the world, and combining with spice trade which muddies the origins further. Catnip is in the mint family, which is where it gets the nickname "cat mint".
Catnip has been used for thousands of years for its medicinal properties, and it was also used as a culinary herb in Europe during the Middle Ages. It was later introduced to North America by European settlers and has since become naturalized in many parts of the continent.
The chemical in catnip that makes it attractive and "addictive" to cats is called nepetalactone. Nepetalactone is an organic compound found in the essential oil of catnip leaves and stems. When cats smell nepetalactone, it stimulates special receptors in their noses, it can cause a variety of responses in cats, such as increased playfulness, hyperactivity, and relaxation.
Catnip is also safe for human consumption. Catnip has been cultivated for thousand sof years. Commonly used in teas and in herbal medicine. The leaves and young shoots of the plant can be used fresh or dried to make teas, soups, stews, and sauces. The flavor of catnip is often described as minty or slightly lemony, and it can be used in the same way as other herbs such as mint or basil. Lastly, pollinators like honeybees and bumblebees absolutely love it too.
Here is how you can grow your own!
Location - Catnip grows best in full sun to partial shade, in well-draining soil that is rich in organic matter. Choose a location in your garden that gets at least 6 hours of direct sunlight each day.
Planting - Catnip can be grown from seeds or seedlings. If planting from seeds, sow them directly into the soil in the spring, after the last frost. If planting seedlings, space them 18-24 inches apart. Catnip can spread like mint, so planting in a pot is also a good idea.
Watering - Keep the soil moist, but not waterlogged. Water deeply once or twice a week, depending on weather conditions. Catnip can handle plenty of abuse, but if overwatered it will suffer from root rot and die-back fairly quickly.
Fertilizing - Catnip does not require a lot of fertilizer, but it can benefit from a light application of a balanced fertilizer once or twice a year. Catnip is a perennial, meaning it will benefit from a fertilizing in the beginning of the year before it starts to grow, and at the end of the season to prepare it for winter. I prefer to fertilize with Nitrogen in the spring, and phosphorus in the fall.
Pruning and care - Catnip can become leggy if not pruned regularly. The dense inner leaves will block sunlight and become bare inside the plant.. Pruning opens up leaves to the inside of the plant. Pinch back the stems by one-third in early summer to encourage bushier growth. Watch for pests, catnip is generally resistant to pests and diseases, but it can attract aphids and whiteflies. If you notice pests, a general rule of thumb is to spray with neem oil or insecticidal soap. Since you or your animal are consuming this, it is recommended to wash the harvest, regardless of what you spray on the crop for pests or diseases.
Harvesting - You can harvest the leaves of the catnip plant once it reaches about 6 inches tall. Cut the leaves from the stems and dry them for later use.
]]>
https://migardener.com/blogs/blog/how-to-grow-with-coconut-coir2023-02-15T15:04:04-05:002024-08-02T12:08:26-04:00How To Grow With: Coconut CoirLuke Marion
Did you know? The global production of coconuts was 63.7 million metric tons, or 138,000,000,000 POUNDS! Most of which, was wasted. Until a discovery was made that turned this bi-product into garden gold! The remaining shell and husk can be mulched down which can behave just like soil. This is known as coco coir. Some people also will call it coco-peat, because it is a peat moss replacement but behaves very much the same.
Coconut coir is a natural fiber that is derived from the husk of coconuts. It is a versatile and sustainable material that has a wide range of uses in gardening, farming, and even oil spill cleanup!
One of the main uses of coconut coir is as a growing medium for plants. Coconut coir is lightweight, highly absorbent, and has excellent drainage properties, which makes it an ideal choice for growing plants. It is also pH-neutral, which means that it can be used to grow a wide variety of plants without the need for additional soil amendments.
Coconut coir can be used as a soil amendment to improve soil structure and water retention. When mixed with soil, it can help to loosen compacted soil and improve drainage, which can help to prevent waterlogging, root rot, damping off, anaerobic soil, and other problems. Coconut coir is also a good source of organic matter, which can help to support healthy microbial activity in the soil. You can pick some up for your garden HERE.
To use coconut coir, it is important to first rehydrate the material. This can be done by soaking the coir in water for several hours, or by adding water directly to the coir and allowing it to absorb the moisture. Once the coir is fully hydrated, it can be used however you wish.
Coconut coir can also be turned into a superior potting mix or seed starting mix free of sphagnum moss. Which has become more sustainably harvested throughout the years, but still is not preferred by many gardeners. This makes coco coir a perfect substitute.
To make potting mix:
mix coco coir with an adequate amount of water to hydrate the mix. Once the coco coir is fully expanded with water, mix in 1 part Perlite, 1 part vermiculite, and your choice of organic fertilizers. We use Trifecta+, and we use roughly 1/4 cup per gallon.
Another common use of coconut coir is as a substrate for mushroom cultivation. Coconut coir can be used to grow a variety of mushroom species, including oyster mushrooms and shiitake mushrooms to name a few. It provides a clean, sterile environment for the mushrooms to grow, and is also highly absorbent, which helps to maintain optimal moisture levels.
Coconut coir can also be used as a bedding material for livestock, such as chickens and horses. It is highly absorbent and helps to control odors, which can make it a more pleasant and hygienic environment for the animals. Coconut coir can also be used as a natural litter for cats, which is an eco-friendly alternative to traditional clay-based litters.
note: Once coco coir has been soiled and needs to be refreshed, spread it in the garden or compost it for maximum usefulness!
Regardless of how you use your coir, I hope you learned something new, enjoyed reading this post, and hopefully it hellps your garden in some way.
Grow bigger, - Luke
]]>
https://migardener.com/blogs/blog/how-to-grow-organic-basil2023-01-27T17:46:12-05:002024-07-24T16:52:10-04:00How To Grow: Organic BasilLuke Marion
There are many varieties of basil, but some of the most common include sweet basil, Thai basil, lemon basil, and holy basil. There are almost 60 varieties of basil overall! Basil has been cultivated for thousands of years. It is believed to have originated in India and was brought to other parts of the world by traders and travelers. It was also used in ancient Egypt, Greece, and Rome for both culinary and medicinal purposes. It was used as a symbol of love and fertility in ancient Greece and was also considered a sacred plant in ancient India. In more modern times it is loved on pizza, italian cooking, curries both thai and indian, and even in tea!
In this blog post I will explain how to grow basil from start to finish.
location: Basil prefers full sun and well-drained soil. If you're growing basil in a pot, choose one that is at least 12 inches deep and has drainage holes.
Soil: Basil grows best in soil that is rich in organic matter. Mix in compost or well-rotted manure to improve the soil's fertility. Basil does NOT like to be overwatered, and will show signs of root rot very easily if it is overwatered, so ensure soil is well draining. We use mostly compost for our growing medium, however our native soil also has a relatively high clay content.
Planting: You can start basil from seed or purchase seedlings from a garden center. If you're starting from seed, sow them about 1/4 inch deep and about 2 inches apart. If you're using seedlings, plant them about 8 inches apart.
Watering: Water the basil deeply and regularly, keeping the soil consistently moist but not waterlogged. Avoid getting water on the leaves, as this can lead to fungal diseases.
Fertilize: Basil benefits from regular fertilization. You can use a balanced fertilizer, such as Trifecta+ or Vegagrow which we use exclusively in our garden, or use a high-nitrogen fertilizer when the plant is actively growing.
Pruning Pinch off the tips of the basil plant to encourage bushier growth and prevent the plant from getting too tall. This will also stop it from going to seed. Once a plant produces seed, the plant will stop growing and begin to die.
Note: You can also propagate basil super easily! Simply stick some cuttings in a cup of water for a week or two until you see roots form, then simply transplant it to a pot with soil or directly in the ground! Free plants!
Harvesting: You can start harvesting basil leaves when the plant reaches about 6 inches tall. Regular harvesting will encourage bushier growth. leaves can be used fresh or dried. At the end of the season when there is frost threatening, simply cut the entire plant off, bring it indoors, and hang it up to all dry. Basil flowers are also edible and super delicious!
Pests and diseases: Keep an eye out for common basil pests such as cabbage moths, deer, rabbits, aphids and whiteflies, and diseases such as powdery mildew and downy mildew.
Try some of these amazing basil recipes!
Basil tea
ingredients:
1 cup of water
1-2 tablespoons of fresh basil leaves
Honey (optional)
Instructions: 1. Bring the water to a boil in a small saucepan. 2. Remove the saucepan from heat and add the basil leaves. 3. Allow the basil to steep for about 5-10 minutes, or until the tea reaches your desired strength. 4. Strain the tea through a fine-mesh sieve or a coffee filter to remove the basil leaves. 5. Sweeten with honey to taste, if desired.
Candied Basil Flowers & leaves
Candied basil flowers can be used as a garnish for desserts, such as cakes, ice cream, or yogurt. They can also be used to decorate cocktails or other drinks. They add a delicate sweetness and a unique basil flavor that complements many sweet dishes.
Ingredients:
Fresh basil flowers & Leaves
Egg whites
Powdered sugar
Instructions: 1. Pick the basil flowers or leaves and gently rinse them in cold water. Pat them dry with paper towels. 2. Beat the egg whites in a small bowl until they are frothy. 3. Dip each basil flower into the egg whites, making sure that it is fully coated. 4. Sprinkle powdered sugar over the basil flowers, shaking off any excess. 5. Place the basil flowers on a baking sheet lined with parchment paper. 6. Let the basil flowers and leaves dry for at least an hour, or until they are completely dry. 7. Once dry, store them in an airtight container in a cool dry place for a week or so.
Thai Basil Lemongrass Soup
Thai basil soup, also known as "Tom Kha Gai," is a popular and flavorful Thai soup that is made with chicken, coconut milk, and a variety of herbs and spices.
Ingredients:
4 cups of chicken broth
1 pound of boneless, skinless chicken breast, thinly sliced
1 can of coconut milk
2 stalks of lemongrass, bruised
2 kaffir lime leaves
2-3 bird's eye chilies, sliced
2-3 cloves of garlic, minced
1-inch piece of ginger, peeled and minced
2-3 tablespoons of fish sauce
2-3 tablespoons of lime juice
2-3 tablespoons of palm sugar or brown sugar
1 cup of fresh Thai basil leaves
Instructions:
1. In a large pot, bring the chicken broth, lemongrass, kaffir lime leaves, chilies, garlic, and ginger to a boil. 2. Add the chicken and cook for about 5 minutes or until cooked through. 3. Stir in the coconut milk, fish sauce, lime juice, and palm sugar or brown sugar. 4. Bring the soup back to a simmer and cook for another 5 minutes or until heated through. 5. Remove the lemongrass and kaffir lime leaves from the soup. 6. Stir in the Thai basil leaves and cook for just a minute. 7. Taste and adjust seasoning if needed. 8. Ladle the soup into bowls and serve hot.
]]>
https://migardener.com/blogs/blog/how-to-grow-organic-borage2023-01-27T17:15:33-05:002024-07-24T16:52:10-04:00How To Grow: Organic BorageLuke Marion
Borage is a multi-purpose crop in our garden. The leaves, seeds, and flowers are edible, and highly nutritious. Borage is also incredible at attracting pollinators to the garden. Honey bees, hummingbirds, bumble bees, and butterflies all will frequent a borage plant. Here is how to grow it!
location - Borage plants prefer full sun and well-drained soil. They are also tolerant of poor soil, so they can be grown in areas where other plants may struggle. Borage plants will get large, so make sure they are in a location that will allow for their size. An average plant when fully mature can be up to 3 feet wide!
Planting - Borage seeds can be sown directly into the ground after the last frost in spring. Sow the seeds thinly, about 1/4 inch deep, and cover with soil. Keep the soil moist but not waterlogged. Germination can take up to 10 days. Once the seedlings are 2-3 inches tall, thin them out to about 18 inches apart. This will give the plants enough room to grow and develop.
Watering and fertilizing - Borage plants are drought-tolerant, but they will perform better with regular watering. Water the plants deeply once a week, making sure to keep the soil moist but not waterlogged. Additionally, borage plants benefit from a balanced fertilizer. They are VERY fast growing, and in my experience will benefit from lots of Nitrogen due to all of the foliage they produce.
Pests and diseases - Borage is generally considered to be a hardy, disease-resistant plant. However, it can be susceptible to some common garden pests, such as aphids, spider mites, and whiteflies. These pests can cause damage to the leaves and flowers, and can also spread diseases. To prevent or control these pests, you can use insecticidal soap or neem oil, or manually remove the pests by hand.
Re-seeding - Borage will readily reseed itself if you are not careful. It is very important to remove old flowers to not only encourage new flowers and growth, but also to discourage seeds from being formed. Borage can quickly take over a garden space if you are not careful. We have found many plants the next spring when we weren't as meticulous at removing seed pods in the fall.
Harvesting - Borage flowers are edible and can be used to add a cucumber-like flavor to salads, sandwiches, and drinks. They are mildly sweet and have a delicate texture. They can also be used as a garnish. The flowers should be harvested when they are fully open, and can be dried or used fresh.
The leaves can be wilted down and consumed, they can be eaten fresh though the hairy stems can be a bit unpleasant in my opinion. Borage leaves are a good source of minerals like potassium, calcium and magnesium, vitamins like vitamin C and vitamin K. It also has small amounts of essential amino acids and essential fatty acids.
Borage seeds are a good source of minerals, vitamins and essential fatty acids. They are high in GLA, which is an omega-6 fatty acid that can help reduce inflammation in the body. They are also a good source of magnesium, potassium, and zinc. It is advised to roast and press the seeds to extract the oil, since borage seeds are recommended to be eaten cooked and never eaten in large quantities as they do contain pyrrolizidine alkaloids.
]]>
https://migardener.com/blogs/blog/could-you-be-experiencing-what-crop-scientists-call-the-black-hole-of-nutrients2023-01-21T12:14:07-05:002023-02-15T14:21:52-05:00Could You Be Experiencing What Crop Scientists Call The BLACK HOLE Of Nutrients?Luke Marion
Have you ever had a soil test done and it looked as if Nitrogen, Phosphorus, and Potassium was non-existent? Or was just one non-existent? Try as you might, fertilizer, more soil tests, more fertilizer, and more soil tests. Still your results look like this.
Believe it or not, you might be experiencing what crop scientists call the "black hole" effect. This is where there is an underlying issue with the soil conditions that are robbing the nutrients just as fast as you put them in. Soil chemistry happens the same way it happens in high school chemistry class. Certain reactions happen and when that happens, a new chemical compound is made, or sometimes biological activity is causing nutrients to be used as food rather than food for your plants.
Nitrogen If you are adding known sources of Nitrogen to your soil such as blood meal, kelp meal, organic fertilizers, manure, etc. but the results show up as deficient or low, here are the causes to look for.
Mulch - any form of un-broken down material should remain on the soil surface. If you disturb the soil and mix mulch into the soil, beneficial bacteria which use Nitrogen to survive will use the nitrogen as nitrate or nitrogen gas, both forms plants cannot use. This process is called nitrogen immobilization. Nitrogen levels will be restored once the organic material has broken down fully and the Nitrogen is re-converted from an unusable form to a usable one.
Over-fertilizing - If you are a habitual fertilizer, and apply large amounts of Nitrogen rich fertilizer to the soil, you can be killing off beneficial bacteria that convert nitrogen into usable forms for plants to use. This is commonly seen with synthetic fertilizers, but is also seen even with things like urine.
Do you know why the grass dies and doesn't come back where dogs pee? The nitrogen in pure urine is too strong and kills the soil biology until it can be repaired with the addition of new Nitrifying bacteria.
Phosphorus If you are adding known sources of Phosphorus to your soil such as rock phosphate, bone meal, or organic fertilizers, but the results show up as deficient or low, here are the causes to look for.
High Calcium levels - Is your native soil very alkaline (has pH over 8), then your soil most likely has a lot of lime in it. You most likely live on soil with dolomitic lime deposits. Or do you regularly burn and spread ashes on your garden? Ashes contain calcium oxide (lime), and in high levels can cause problems. Or what if you use tons of gypsum or dolomitic lime to soften the soil? You can have too much calcium if overused.
When calcium levels are high in the soil, it can combine with phosphorus to form insoluble compounds, such as calcium phosphate. These compounds are not readily available for plant uptake, and as a result, the plant may not be able to access the phosphorus it needs for growth and development. This means you could apply calcium until the cows come home and never see a trace of it.
Potassium If you are adding known sources of Potassium to your soil such as potash, wood ash, greensand, or organic fertilizers, but the results show up as deficient or low, here are the causes to look for.
High clay content - Is your soil heavy in clay? This could be the main cause. Clay has a tight molecular structure, and has the ability to bind larger molecules together. Imagine Potassium being your size 9 foot, but clay is a size 7 shoe. it's so snug that you can't pull your foot out if you try until you lay on your back and have a friend pull it off for you.
Clay can be very good for your garden, but in high amounts, and unamended, it can lock up potassium as fast as you're adding it. Try breaking the clay up with compost, gypsum, or a combination of the two to break up the clay's structure.
How do you know when clay's structure has been broken up? Clay is slippery because of the tight bonds of minerals such as calcium. You will know when your soil is broken up when you can no longer feel a wet slippery texture if it is formed into a ball. The soil should crumble, or at least the edges break away before that tight of a ball can be formed.
]]>
https://migardener.com/blogs/blog/how-to-grow-organic-perennial-asparagus2023-01-20T11:20:49-05:002024-07-24T16:52:10-04:00How to Grow: Organic Perennial AsparagusHalley -Author at MIGardener
When properly planted, asparagus can be one of the hardiest and longest to last vegetables in the garden. These perennial plants can grow up to 40 years old and only get larger each year. Crowns at full maturity can produce 9-13 spears! Follow this simple growing guide to learn the simple ways to plant asparagus to harvest for years to come. Asparagus can be planted in two types; seed and rhizome. We carry both, but the rhizomes can only be sold during the early spring during their dormant stage. You can find our varieties here.
Here's how to start: Soil Prep:
Because we want to grow asparagus as a perennial, it's important to plant from seed in loose soil. Asparagus loves sandy well-drained soil. Combine a 50/50 mix of sand and compost to prepare the perfect soil. You should amend and thoroughly fertilize soil once before planting. Amending and fertilizing every year would involve disrupting the crown and roots of the plant and is not recommended. In order to properly establish the deep root system needed for it to produce a harvest year after year, till the soil a foot deep. This way, the soil can insulate the plant through frost and winter. Ph should be neutral ( between 6.5-7.5)
Growing in pots is not recommended - this doesn't allow for proper insulation during cold harsh winters.
Fertilizing:
Asparagus prefer a nitrogen rich soil, but also require adequate amounts of phosphorus for good root development. Because Asparagus are perennial, this means they have an aggressive root system that moves quickly throughout the soil in order to establish itself before winter. Phosphorus is responsible for root development. Asparagus is actually the young shoots of the asparagus fern, and this requires Nitrogen to promote green growth. Plants should be fertilized 2 times per year, once in spring to pull the plant out of dormancy, and once in the fall before the plant goes dormant to establish the roots before winter.
Watering:
Plants prefer moist and well watered soil. Their natural habitat is sandy loam beaches and ditches where drainage is adequate but irrigation is plentiful. Plants should be mulched to ensure good soil moisture during summer heat. Plants should also be kept from being waterlogged by making sure soil is at least 40% sand and 20% organic matter.
Sunlight:
Asparagus requires 6-8 hours of sunlight. If you are planting in a space that leans on the sunnier side, make sure to apply mulch throughout the year to protects the soil from drying out between watering. Asparagus will grow wild in areas that have heavy overhead foliage. They thrive in ditches, beaches, and along bluffs where the water comes from runoff and gathers, but also the surroundings provide protection from the hot sun. This means Asparagus can grow in a wide variety of growing conditions in your garden.
Planting:
Dig a trench for planting, place plant or rhizome in and cover with soil, lightly pat down once covered. Plant 8-12 inches apart.
From plant: 6" deep trench
From rhizome: 10-14" trench
Water with compost tea to fertilize and heavily mulch around the crown in order to keep weeds from interrupting the growing process.
Harvesting:
The problem that most people have with asparagus is that they are too eager to harvest in the first year! Do not harvest in the first year. Patience is key when it comes to harvesting asparagus. With patience, your plants will be able to establish hardy and deep rooting systems and will eventually produce multiple shoots of asparagus per crown. After three years of establishing, you'll be able to harvest twice a year for up to fifteen years!
To harvest, snap off 8-10 inch long spears less than 1 inch in diameter before the buds open. Leave spears smaller than a pencil to grow. Harvesting season starts in May and continues through June in most regions. Make sure to complete the harvest before July 1st. Do not cut the ferns that grow after harvesting until they are completely dead in the fall or just before growth begins in the spring to avoid damaging the crown.
Did you enjoy this post? MIgardener is passionate about sharing free gardening tips and information! If you are looking for inspiration in the garden, make sure to check out our Pinterest page. Check us out at MIgardener.com or on youtube, Instagram, and Facebook.
]]>
https://migardener.com/blogs/blog/how-to-grow-amaranth-complete-growing-guide2023-01-20T11:12:43-05:002024-07-24T16:52:10-04:00How to grow Amaranth - Complete Growing GuideLuke Marion
Amaranth is a group of more than 60 different species of plants, which belong to the Amaranthaceae family. These plants are known for their highly nutritious seeds, which are rich in protein, fiber, and various minerals and vitamins. Amaranth is native to Mexico and Central America, but it has been cultivated in other parts of the world for thousands of years.
Here are 5 steps to grow Amaranth:
1. Choose the right variety There are many different varieties of amaranth, each with its own unique characteristics. Some varieties are better suited for certain climates or growing conditions than others. Some are ornamental and pretty and do not produce desirable good tasting seeds to consume. Some plants are small, others are very large. Depending on your application, that will decide which variety to go with.
2. Prepare the soil Amaranth prefers well-draining soil with a slightly acid pH. Anything around 6-6.5 is ideal, but neutral pH soil won't harm much at all. If your soil is heavy clay or sandy, amend it with organic matter to improve its structure. Amaranth is a grain, and is prone to blowing over like all grains are. Try to ensure good deep soil for the roots to anchor the plant in well.
3. Planting Amaranth seeds should be planted directly in the ground and should NOT be transplanted. Amaranth will grow far better with minimal disturbance to the roots. Plant the seeds 1/4 inch deep and spaced 2-3 inches apart. Depending on variety, some can be much closer together, but generally plants will get quite large, and plants may need to be thinned to be 6-8 inches apart.
4. Fertilizing Amaranth is a grain, this means it loves lots of Nitrogen. Much like corn, amaranth enjoys a well balanced fertilizer, but with a high priority on Nitrogen. The more you give it, the better it produces.
5. Watering Amaranth does not require nearly as much water as you would think. The native Americans and Aztec Indians grew Amaranth in arid and dry desert regions. Yes, it still needs water, however it can be left dry far longer than most crops in your garden. I typically water our amaranth about once every 1-2 weeks as needed.
6. Harvest and store Amaranth is ready to harvest when the leaves and stalks turn yellow. Cut the plants at the base, and hang them upside down to dry. Once dry, the seeds can be threshed and stored in an airtight container in a cool, dry place.
Try this recipe for popped amaranth! It's like popcorn, but itty bitty!
Popped amaranth is a delicious and nutritious snack that can be enjoyed on its own or used as a topping for various dishes.
Ingredients:
1 cup of amaranth seeds
1 teaspoon of oil (optional)
Salt to taste (optional)
Instructions:
Heat a skillet or pot over medium heat. If using oil, add it to the skillet.
Once the skillet is hot, add the amaranth seeds to the skillet.
Use a lid to cover the skillet and shake it gently to distribute the seeds evenly.
As the seeds begin to pop, you'll hear a crackling sound. Keep shaking the skillet occasionally to prevent the seeds from burning.
Once the popping slows down, remove the skillet from the heat and pour the popped amaranth into a bowl.
Add salt to taste, if desired.
Serve the popped amaranth as a snack or use it as a topping for yogurt, ice cream, granola, or salad.
In Mexico they make a deliscious candy with popped amaranth called Alegria, which means happiness in Spanish! They are made into blocks with sweet honey, think of it as a rice krispies but much healthier and then topped with dried fruits and nuts!
]]>
https://migardener.com/blogs/blog/how-to-grow-asters-complete-growing-guide2023-01-20T11:12:16-05:002024-07-24T16:52:10-04:00How to Grow Asters - Complete Growing GuideLuke Marion
Asters are beautiful flowers that come in a wide variety of colors and sizes. Some look like daisies, others look like a cactus blossom with long wispy petals. They are easy to grow and care for, making them a great choice for both experienced and novice gardeners. In this post, we will go over the basic steps for growing asters in your garden or in containers.
1. Location First, it's important to choose the right location for your asters. They prefer well-drained soil and full sun to partial shade. If you're planting them in a garden bed, make sure to prepare the soil by removing any weeds and adding compost or other organic matter. If you're planting in containers, use a high-quality potting mix and make sure the container has drainage holes.
2. Planting When it comes to planting, asters can be planted from seed or from established plants. If you're planting from seed, start them indoors about 6-8 weeks before the last frost date in your area. If you're planting established plants, make sure to space them about 12-18 inches apart. Asters will get very large and most gardeners forget this and end up with crowded plants. When planting, make sure to plant the crown of the plant at soil level to prevent crown rot.
3. Watering Make sure to water your asters regularly to keep the soil consistently moist. Asters also prefer to be fertilized regularly with a balanced, water-soluble fertilizer. Once a month is a good schedule during the growing season.
4. Care & maintenance Asters also require regular deadheading, or removing spent blooms, to encourage more blooms to form. Deadheading also helps to prevent the plant from self-seeding and potentially becoming invasive.In addition to regular care, asters may also require staking or support as they grow taller. We use small bamboo stakes to support taller stems. This will help to prevent them from falling over or breaking under the weight of the blooms.
5. Pest control Asters are relatively hardy, but they can be susceptible to pests such as aphids, spider mites, and Japanese beetles. Keep an eye out for these pests and use an appropriate insecticide or pesticide if necessary. Asters can also be affected by fungal diseases such as powdery mildew and botrytis. To prevent these diseases, make sure to provide good air circulation around the plants and avoid overcrowding.
Finally, it's important to note that asters come in a wide variety of colors, shapes, textures, and sizes. Some popular varieties include the New England aster, which can grow up to 4 feet tall and has large, purple blooms, and the dwarf aster, which only grows to about 12 inches tall and has small, white blooms. No matter what variety you choose, asters are sure to add color and beauty to your garden.
]]>
https://migardener.com/blogs/blog/how-to-grow-artichokes-complete-growing-guide2023-01-20T06:40:44-05:002023-02-15T14:21:24-05:00How to Grow Artichokes - Complete Growing GuideLuke Marion
Artichokes are a delicious and unique vegetable that can be grown in a variety of climates. Artichokes can be a perennial for zones 7-12, but can still be grown in zones 3-6 they will just be an annual and will need to be replanted each year. Artichokesare a member of the thistle family and are native to the Mediterranean region. Growing artichokes can be a fun and rewarding experience for both experienced and novice gardeners. In this blog post, we will discuss how to grow artichokes in your own backyard.
Choosing the Right Location
Artichokes require full sun and well-drained soil to thrive. They also prefer a slightly acidic soil with a pH between 6.0 and 6.5. If your soil is heavy clay or sandy, it may be necessary to amend it with organic matter such as compost or peat moss. Artichokes also need lots of space. Plants regularly will grow 3-4 feet wide! The plants have large leaves and will definitely shade out and crowd out other small plants, so give them room.
Planting
Artichokes can be planted in the spring or fall, depending on your climate. In areas with mild winters, fall planting is recommended. In colder climates, spring planting is best. Artichokes take 110-120 days to mature, so starting early is essential for those in colder climates with shorter seasons. Start by choosing healthy, disease-free plants. Plant them 2-3 feet apart in rows that are 3-4 feet apart. The soil should be moistened before planting and kept moist until the plants are established.
Watering
Artichokes require consistent moisture, but not standing water. Water them deeply once or twice a week, or more frequently in hot, dry weather. A good rule of thumb is to provide about 1 inch of water per week (about the same amount as you would give a tomato). Remembering that they are mediterranean will help to reduce the amount you have to water. A mulch of organic matter around the base of the plant can help retain moisture and suppress weeds until the plant is large enough to shade the soil to hold moisture near the plant as a living mulch.
Fertilizing
Artichokes benefit from regular fertilization. They are heavy nitrogen feeders. Apply a balanced fertilizer, but one that focuses on Nitrogen (such as Trifecta like 5-10-4) every 4-6 weeks during the growing season. It's also a good idea to side-dress the plants with compost or aged manure. You can also liquid feed with a fertilizer like compost tea or worm compost tea for a gentle but regular feeding.
Pruning
Artichokes require minimal pruning during the growing season, but it's important to remove dead or diseased leaves and flower heads to keep the plant healthy. The largest amount of pruning will be done at the end of the season. For those in warmer climates where Artichokes are perennial, chop the entire plant off roughly 8 inches from the soil level, mulch heavily with leaves, and this will encourage the new growth and reflowering to form more artichokes next season.
Harvesting
Artichokes are ready to harvest in about 110-120 days after planting. The artichokes are ready to harvest when the buds are firm and tight, and the scales begin to separate. Believe it or not, what you are harvesting is actually the unopened flower! To harvest, cut the stem about 2 inches below the bud. It is highly important to harvest to ensure more artichokes. NOTE: Each subsequent harvest will have more artichokes but they will be smaller than the first harvest.
Pest and Disease Control
Artichokes are relatively pest and disease-free. However, aphids, whiteflies, and spider mites can be a problem. Keep an eye out for these pests and treat them with insecticidal soap or neem oil.
]]>
https://migardener.com/blogs/blog/10-simple-ways-to-amend-soil2023-01-18T10:53:16-05:002023-02-15T14:21:24-05:0010 Simple Ways to Amend SoilLuke Marion
Amending your soil is important for several reasons:
Improving fertility: Soil that is low in essential nutrients, such as nitrogen, phosphorous, and potassium, can lead to poor plant growth. Amending your soil with organic matter and fertilizers can help to improve its fertility and promote healthy plant growth.
Enhancing water retention: Soil that is heavy in clay or lacks organic matter can have poor water retention. Amending your soil with organic matter can help to improve its water-holding capacity and reduce the need for frequent watering.
Improving soil structure: Soil that is compacted or heavy in clay can have poor structure, which can lead to poor drainage and root growth. Amending your soil with organic matter and gypsum can help to improve its structure and promote healthy plant growth.
Controlling pH: Soil that is too acidic or too alkaline can inhibit plant growth. Amending your soil with lime or sulfur can help to adjust the pH level and make it more conducive to healthy plant growth.
Reducing erosion: Soil that is bare or poorly protected can be subject to erosion. Amending your soil with cover crops or mulch can help to reduce erosion and protect your soil from the elements.
Here are 10 ways you can improve your soil quality simply and easily for a better garden.
Composting: Composting is a great way to improve the overall health and fertility of your soil. By adding compost to your soil, you are adding essential nutrients and microorganisms that will help to promote healthy plant growth. Compost adds humus which aids in water retention and adding organic material which will break down over time. This helps to add spaces for beneficial fungi to
Cover Cropping: Cover cropping is another great way to improve your soil. By planting a cover crop, such as clover or rye, you can add organic matter to your soil and help to control erosion.
Mulching: Mulching protects your soil from erosion and to keep it moist. By adding a layer of mulch to your soil, you can also help to add organic matter to your soil and promote healthy plant growth. Mulch can be shredded wood, pine needles, straw, leaves, and even semi-finished compost.
Liming: If your soil is too acidic, you may need to add lime to it. Lime is a natural soil amendment that can help to raise the pH level of your soil and make it more alkaline. PLEASE NOTE, a soil pH test should be done to ensure you are not adding too much. This needs to be done yearly as well. The good thing is though that very few soils are too acidic.
Gypsum: Gypsum is a natural soil amendment that can help to improve the structure of your soil. It can help to break up heavy clay soils and make them more porous, allowing water and air to penetrate more easily. Gypsum is great too because it does not affect soil pH.
Rock Phosphate: Rock phosphate is a natural soil amendment that can help to promote healthy plant growth. It is a great source of phosphorus, which is an essential nutrient for plants. It also helps to regulate soil biology. Many beneficial bacteria and fungi use phosphate to grow and multiply.
Greensand: Greensand is a natural soil amendment that is rich in iron, potassium, and other trace minerals. It is a pulverized roxk deposit and contains hundreds of beneficial micronutrients that will be like a multivitamin for your plants and soil. It can help to promote healthy plant growth and can be used to improve the structure of your soil.
Blood Meal: Blood meal is a natural soil amendment that is high in nitrogen. It can help to promote healthy plant growth and can be used to improve the fertility of your soil.
Double digging: Double digging or broad forking can help to loosen the soil, especially when using compost as an amendment. The breaking up of soil in a gentle way
Vermicompost: Vermicompost is one of the best ways to improve the fertility of your soil. Worms break down organic material in a natural way, increasing nutrients, but also loosening soil. Many gardeners will add composting worms right to their garden, while others will compost in their garage in worm bins and add just the worm castings to the garden. By adding vermicompost to your soil, you are adding essential nutrients and microorganisms that will help to promote healthy plant growth.
By using these methods, you can improve the health and fertility of your soil, which in turn will lead to healthier plants and a more bountiful garden. Remember that soil improvement is a gradual process and it may take a while to see the results of your efforts. Regardless of what you do, just remember you are making a difference!
Grow bigger, Luke
]]>
https://migardener.com/blogs/blog/what-is-corn-smut-and-how-to-prevent-it2023-01-18T10:35:29-05:002023-02-15T14:20:51-05:00What is Corn Smut?!? (And How to Prevent It)Luke Marion
Have you ever grown corn, and when you went to harvest it you were shocked, disgusted, and horrified by large black, blue, or grey growths on your corn? This is called Corn Smut! Believe it or not, it's actually edible too. Not that I would prefer it over corn, in Mexican culture, it is considered a delicacy. So what is corn smut and how can you prevent it?
Corn smut, also known as Ustilago maydis, is a fungal disease that affects corn plants. The fungus infects the kernels of the corn, causing them to swell and form grayish-black, tumor-like structures known as galls. These galls can grow to be quite large and are filled with a black, powdery spore mass that can be spread to other plants by wind or insects.
The fungus that causes corn smut thrives in warm, humid conditions and is most common in areas with mild winters and wet summers. It can also be spread through contaminated seed, equipment, or soil.
To prevent corn smut, you should practice good crop rotation, using different fields for corn each year. Also make sure to avoid planting in areas that have been recently affected by the disease. Using disease-free seed and ensuring proper sanitation of equipment and tools are also important steps in preventing corn smut. You can alo buy corn that has been treated with a bio-fungicide, however this is often not available for home gardeners, and when it is it is NOT organic.
Home gardeners can also use fungicides to prevent infection with limited success. It is important to note that fungicides need to be applied at the right time and in the right amount to be effective. Applying fungicides too early or too late in the growing season, or using the wrong type of fungicide can result in ineffective control of the disease. Regardless of organic or inorganic application, studies show mixed results with application, so I would recommend not spending the time or money.
Another preventive measure that can be taken is to remove and destroy any infected plants. This will help to reduce the amount of spores in the environment and make it less likely that the disease will spread to other plants. If you do end up getting it, maybe consider trying some! At least you won't be wasting any food. Hey... When life hands you lemons, sometimes you need to make lemonade.
Grow bigger, Luke
]]>
https://migardener.com/blogs/blog/how-to-grow-your-own-ginger-at-home2023-01-15T18:08:23-05:002023-02-15T14:20:51-05:00How to Grow Your Own Ginger at Home!Luke Marion
Knobs of ginger sold at grocery stores are not only expensive, but rarely do you need all of it, meaning that shriveled up part you ended up not using just got wasted. Well what if you could grow tons of ginger, in your garden or even a container, use what you need, let the rest keep growing, and end up with a product so high quality that you will never go to the store again for it? Then, HERE WE GO! *Que magic school bus music*
Growing ginger is easy. Let's get started. We did a video on it HERE but below is a very thorough step by step.
Step 1: Purchase Ginger Roots
The first step in growing ginger at home is to purchase ginger roots. Look for ginger roots that are plump and have a few buds or “eyes” on them. These buds will eventually grow into shoots and leaves. You can find ginger roots at most grocery stores or online.
Step 2: Preparing the Soil
Ginger prefers well-drained soil that is rich in organic matter. If your soil is heavy clay or sandy, you can amend it with compost or peat moss to improve the drainage and fertility. You can also use a potting mix specifically formulated for ginger. Ginger also prefers a slightly acidic soil with a pH between 5.5 and 6.5. Ginger can be grow in-ground in warmer regions with longer growing seasons, or grown in containers in areas with shorter growing seasons. Ginger also thrives in confined locations where other plants may not do as well. Farmers often will plant ginger as an understory crop under coconut trees for a polyculture and dual harvest to maximize the return on their land.
Step 3: Planting the Ginger Roots
Plant the ginger roots with the buds or “eyes” facing up, about an inch deep in the soil. Space the roots about 4 to 6 inches apart. Water the soil thoroughly after planting to help settle the roots. Keep the soil consistently moist but not waterlogged. Ginger doesn't like to be flooded. Yes, it is tropical, but the soil it grows in naturally would drain freely as well as have many other plants to share the excess water with. Just make sure you are not watering more than needed. In our garden, we usually water our ginger about once a week. We also grow in containers since we live further North.
If you start your ginger in containers like this, make sure to transplant once the roots begin to poke out the bottom. This is excellent to save on space, and get many plants growing in a small area.
Step 4: Provide Adequate Light, Temperature, and nutrients
Ginger is a tropical plant and prefers warm temperatures between 60-90°F. It also prefers bright, indirect light. Ginger will thrive with 6-8 hours of sun, and loves a humidity around 30-40%, but can tolerate more. If you live in a cooler climate, you can grow ginger indoors near a sunny window or under grow lights.
Ginger are heavy feeders. Though they can grow in a tight space, giving them lots of nutrients is critical to keeping them growing. We use Trifecta+ with amazing results, but any all purpose fertilizer will work great. Just remember that whatever you use should have lots of Nitrogen to assist in leaf growth and plant development.
Step 5: Harvesting the Ginger
Ginger is typically ready to harvest in about 8-10 months. The older foliage will begin to yellow and die back, indicating that the older ginger rhizomes are mature. Carefully dig up the ginger roots and wash off the soil. The younger ginger rhizomes will be tender and very light almost pink. These are the future plants and can be left to grow. The ginger can be used fresh or stored in the refrigerator for later use. But what if you don't want to harvest it all? That's ok! Just dig up a small portion, snap it off, and the ginger will naturally heal and keep growing. Ginger "crawls" under the soil, so the older parts of the plant will remain, while new "fingers" of the ginger sprout new growth. This keeps the cycle going for as long as you keep the plant healthy!
Growing ginger at home is a great way to have a steady supply of fresh ginger on hand for cooking and medicinal purposes. It is a relatively easy plant to grow and care for, as long as you provide it with the right conditions. With a little patience and care, you can enjoy fresh ginger all year round. In addition, you can try different ways of using ginger like making ginger tea, ginger juice, ginger pickle, ginger chutney, ginger marinade, and many more. Ginger is a versatile spice that can be added to both sweet and savory dishes. It is also known for its medicinal properties, including reducing inflammation and aiding in digestion. So, start growing your own ginger today and enjoy the benefits of fresh ginger all year round.
Happy gardening!
Grow bigger, Luke
]]>
https://migardener.com/blogs/blog/life-of-a-gardener-in-1934-a-memoir2023-01-15T12:28:25-05:002024-08-05T16:23:02-04:00Life of a Gardener in 1934 - A MemoirLuke Marion
A memoir as written by Clyde Finch,
It was August, in the year 1934, The Great Depression had hit hard, and times were tough for everyone, but I found solace in the soil and the satisfaction of growing my own food. August was the hottest month, and it was particularly hot and dry. Not as dry as Oklahoma, but dry enough to the point water was being rationed as to not run the well dry. The well we lived on was a bit more fortunate due to the low elevation. We received about 4 gallons of water per hour from the well. Plenty enough to satisfy our needs, but not enough to take for granted.
We lived in a small farming community on the outskirts of town, in Greenfield Indiana. I found it to be particularly challenging to make ends meet, just due to the lack of work, and the time it took to get into the city. But our local farmers co-op assisted in providing some seed to grow our garden and fill it with the staples our family loved to eat. I learned through my father how to save seeds, and we were all encouraged to save seeds to ensure enough supply for anyone who needed some. I wasn't great, but one doesn't get great overnight.
I woke up early every morning, before the sun had even risen, to tend to the chickens, the one cow which gave us milk and butter, and my garden. I was very fond of my garden, and truth be told I enjoyed it more than other farm chores because it was calm, the smell was rich, and the sun wasn't hot. I worked tirelessly, planting, weeding, and harvesting. I had a wide variety of vegetables growing, from tomatoes and cucumbers to peppers and squash. I also had a small plot of corn, which I was particularly proud of. Our neighbor Jane Sutherland would sit on her porch and say, "I think your corn grew another inch last night!" which I believe it did. My secret was using the chicken droppings from the coop. They were free and the plants seemed to spring out of the ground whenever I used them. She was keen to give me compliments, since she knew I would bring her some zucchini in exchange for a small tray of her famous crinkle cookies.
Despite the struggles of the times, my garden flourished. I was able to feed not only myself but also my family and even some of my neighbors. It was a small thing, but it brought me a sense of purpose and pride. My entire family would join me in canning the harvest when it came time. Canning tomatoes was an especially memorable time. Myself as well as my wife and 4 kids would sit around peeling tomatoes all morning. By noon, we would add all the tomatoes to a big pot, place it over the stove, and let it simmer for hours. Once the tomatoes had simmered, Dorothy my wife, would add 1 teaspoon of vinegar to every quart of tomatoes. It was hard to come by lemons so we used vinegar instead. Then we would jar them up and place them in a hot water bath to seal properly.
Speaking of vinegar, if I may digress for a moment. Was used to make one of our kid's favorite summertime recipes. Vinegar lemonade. We would mix 1/4 cup white vinegar with a 2 tablespoons or three if we were splurging with sugar. We added that to a pitcher of cold water and what a treat. There wasn't anything I savoured more than to come in from working the field all day than a glass of vinegar lemonade. Continuing on.
I also found a sense of community in the other gardeners in my area. We would often share tips and tricks, and even trade seeds and seedlings. It was a tight-knit community and we all looked out for each other. We would meet in the small church in town to share each other's seeds and harvest. I saved mustard seeds, tomato seed, and August was too early to bring my town famous butternut squash seeds, but they would be ready in late October after a killing frost. The seeds I would bring would be traded for canned goods, as well as other seeds I was unable to save. There was a gentleman by the name of Clark Holmst who would bring fresh apples, the most crisp and sweet apples you have ever tasted, and he would trade me 5 apples for 20 tomato seeds.
I fervently believe it was community that helped pull us through the hard times. The hard times shaped us, but didn't define us. We built many great memories. Sometimes I almost miss those days. They were simple, had their trials, but the simple things seemed so valuable back then.
]]>
https://migardener.com/blogs/blog/unique-and-old-vegetable-varieties-and-their-journey-to-your-garden2023-01-15T00:22:55-05:002024-08-02T12:27:18-04:00Unique Heirloom Vegetable Varieties and Their Journey to Your GardenLuke Marion
The garden has so many different types of vegetables. But within each type is a variety. Some of these varieties have been saved, cultivated, and preserved for hundreds and in some cases even thousands of years. In this blog post, we will cover the back story of some very exotic, yet beloved heirloom vegetable varieties. Maybe consider adding some of these to your garden!
Zapotec Pleated tomato -
Tomatoes are native to western South America and were first domesticated by indigenous peoples in that region. The Zapotec people, who are indigenous to the southern Mexican state of Oaxaca, likely obtained tomatoes through trade or cultural exchange with other indigenous groups in the region. The tomato has deep ribs or "pleats" and has been grown in Oaxaca for hundreds of years. Commonly roasted for making salsa, tomatoes are seen as the second most important vegetable in Mexican cuisine.
Oaxacan Green Dent Corn -
Oaxacan Green Dent Corn, also known as "cacahuazintle" is a traditional variety of corn that is native to the Oaxaca region of Mexico. It is believed to have been first domesticated by the Zapotec and Mixtec indigenous people in the region several thousand years ago. The Zapotec and Mixtec people have a long history of cultivating different varieties of corn, and Oaxacan Green Dent Corn is considered to be one of the oldest and most diverse varieties. The corn is characterized by its green color, dent or indentation on the crown of the kernels, and a unique flavor. It is used in traditional dishes such as tamales, tortillas and pozole.
Cherokee Trail Of Tears Bean -
The Cherokee Trail of Tears Bean is an heirloom bean variety that is named after the forced migration of the Cherokee Nation in the 1830s, known as the Trail of Tears. The Cherokee Trail of Tears Bean has been passed down through generations of Cherokee farmers and gardeners. The bean is thought to have been grown by the Cherokee people before and during the Trail of Tears, and it is considered to be a reminder of the resilience and perseverance of the Cherokee people. The beans are known for its small size, but with a rich nutty flavor and creamy texture.
Poona Kheera Cucumber -
The Poona Kheera Cucumber is a variety of cucumber originated in the Pune district of Maharashtra, India as early as 1890. The name "Kheera" means cucumber in Hindi, and "Poona" is the former name of the city of Pune. This variety of cucumber is known for its crisp texture and sweet, mild flavor. It is commonly used in Indian cuisine and is often eaten raw or pickled. This cucumber is also brown in color and not like other green cucumbers.
Black Futsu Squash -
A variety of winter squash that is known for its dark, almost black skin and its unique, sweet and nutty flavor. It is believed to have originated in Japan where it's seeds have been preserved for over 200 years. Squash have been of cultural importance to the Japanese people for centuries. These squash are covered with bumps, which indicates it is a more wild strain of squash. The smooth skin as seen on more modern day pumpkins is a long process of breeding to prioritize a smooth skin, without bumps. Wild genetics are seen as hardier and more resilient to adverse climate conditions.
Tiffen Mennonite Tomato -
Originated from the Mennonite community in the Tiffen, Ohio area of the United States. This tomato was brought over from germany by German Mennonites escaping germany in the early 1920's. When they arrived, they settled in communities all across the United States, and brought with them their seeds and extensive knowledge of farming and gardening. This tomato is used for paste, canning, juicing, and sauce, and is of high cultural significance to the Mennonite community even till today.
Mayflower Bean -
It is believed to have been brought over by the Pilgrims on the Mayflower in 1620, when they arrived to the Plymouth colony in Massachusetts. The variety is believed to have been a staple in the diet of the Pilgrims and Wampanoag people, who taught them how to cultivate the bean. Having a long shelf life once dried provided a protein source through winter when hunting was not as fruitful. Used as a drying bean, it was boiled in soups and stews, and even traded for meat from local Native American tribes.
Regardless of the variety, this is just a small sample size of all the amazing varieties that exist, and all of the heirlooms that exist have amazing back stories worth looking into. Happy gardening!
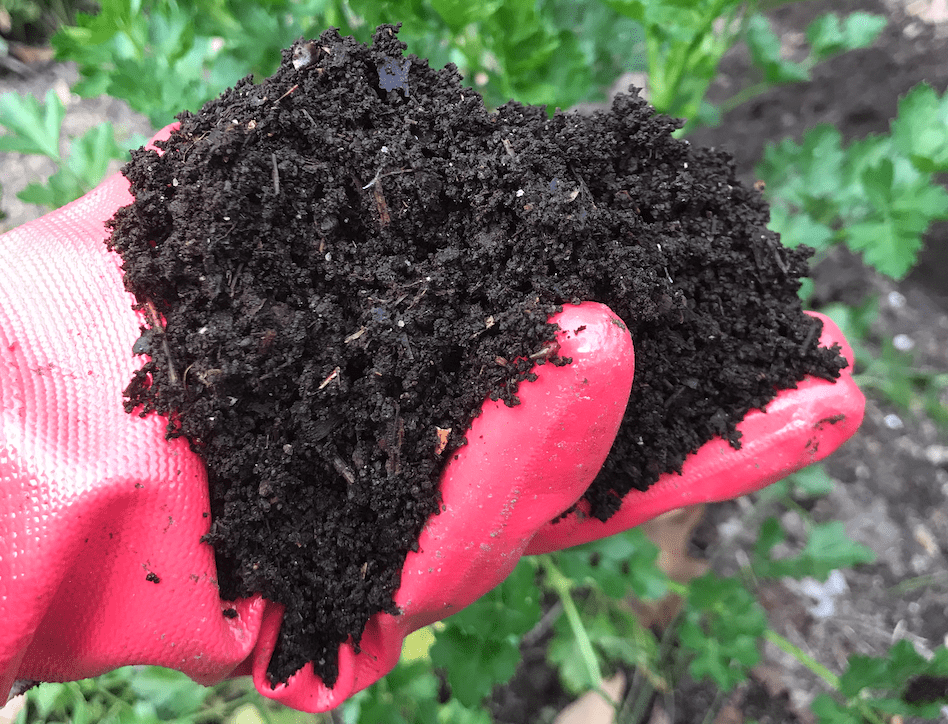


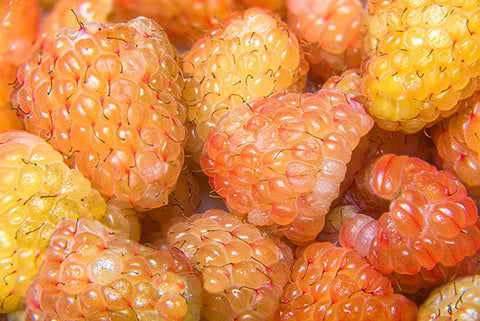


 crushing creates tremendous surface area creating a microscopic abrasive surface which irritates the mites and causes them to shed their coat and die. Mixing DE into the soil or dusting it on the surface will help prevent them from getting out of control. I find the best brand is